-
-
-
Depending on the year the site of attachment differs.
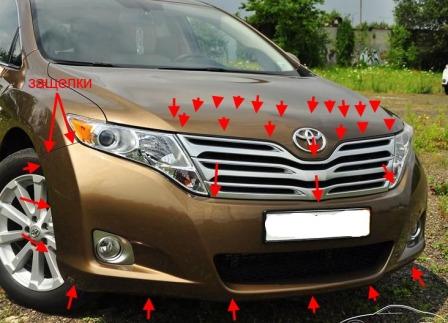
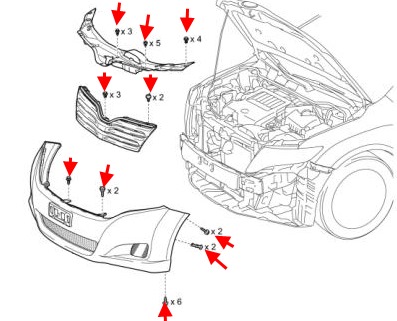
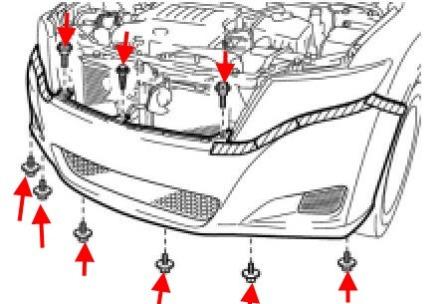
Front bumper
-wrenched the wheel to the left or right side depending on which side we will analyze first.
-in the wheel wells, Unscrew the screws and take out the rivets that attach the fender liner to the bumper.
-under the hood, Unscrew the screws and take out the caps (twisted and inserted top to bottom) that secure the trim and grille.
-remove radiator grille.
-under the grille, Unscrew the three screws (spun down).
-around the bottom part Unscrew the screws (spun up).
-assistant exempt corners of the latches in the wings and remove the bumper from the guides themselves.
-remove the connector from the fog lamp (if any).
-remove connector from the PDC (if any).
-if you have headlight washers, disconnected the hoses (so the liquid will not escape on earth, should prepare a special container).
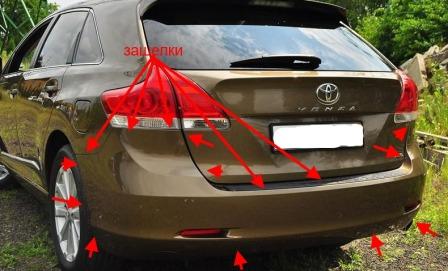
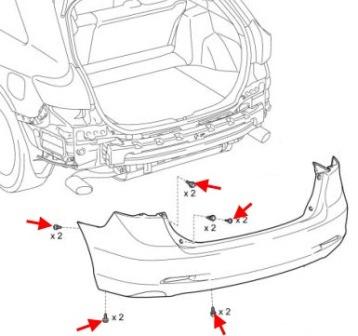
Rear bumper
-open the trunk lid.
-in the opening of the trunk under the tail lights take out the plugs and Unscrew the four screws.
-wheel arches Unscrew the screws that attach the fender liner to the bumper.
-on the perimeter in the bottom part Unscrew the screws (spun up).
-assistant free the bumper from the clips in the fenders, under the rear lights and opening boot removable from the guides themselves.
-remove connector from the PDC (if any).
-remove connectors with additional equipment (if any).

 English
  Italiano
  Français
  русский
  Deutsch
  Español