
 English
  Italiano
  Français
  русский
  Deutsch
  Español
 At first glance, removing a bumper might seem like a simple task. However, in reality, it often turns into a real challenge. The reason is that car manufacturers don’t just use visible bolts and clips—they also install hidden fasteners that securely hold the part in place. If you don’t know where they are, you could waste a lot of time or even damage the plastic.
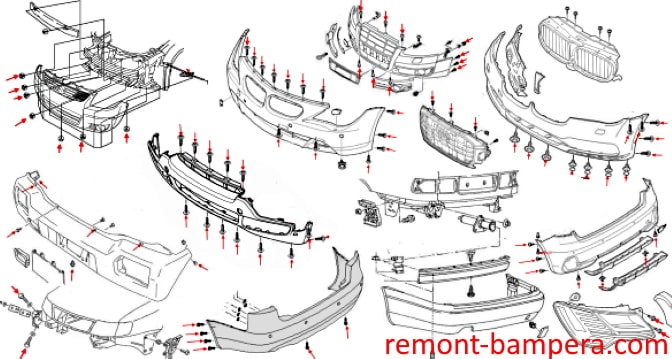
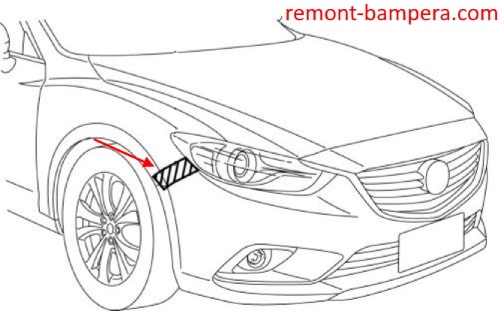
In this guide, we’ve compiled universal tips for removing front and rear bumpers that apply to most vehicles. Additionally, we offer detailed instructions for over 1,200 different car models from various brands. Each guide includes step-by-step descriptions, photos, and diagrams with exact fastener locations to help you remove the bumper quickly, carefully, and without unnecessary effort.
Choose a car brand:
Useful tips on how to remove the bumper and not break anything.
General Bumper Removal Rules: How to Avoid Common Mistakes
Over years of working with cars, I’ve gathered many useful observations that I’m happy to share. Here are the key points to keep in mind:
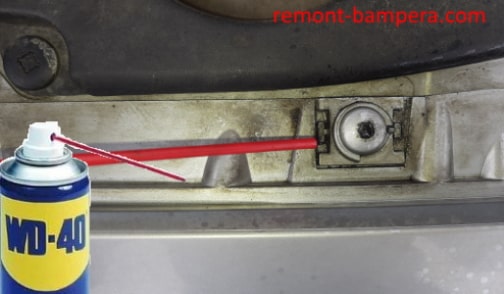
1. Bolts and Screws: Protecting Against Corrosion
Bumper fasteners are constantly exposed to moisture, dirt, and road salt, making them prone to rust. Before unscrewing, apply penetrating lubricant (such as WD-40 or Liquid Wrench). This reduces the risk of stripping threads and makes removal easier.
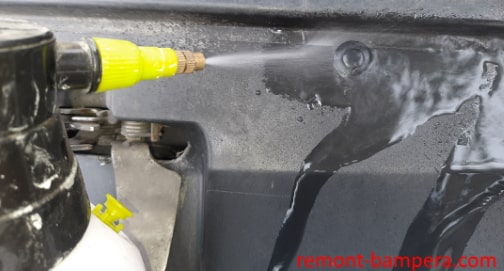
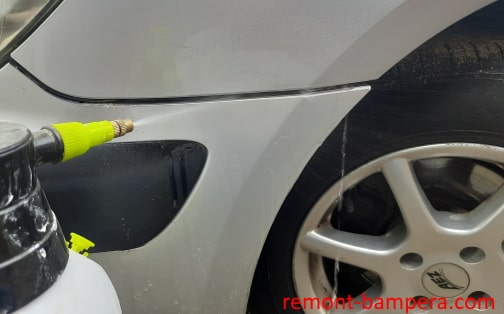
2. Plastic Clips: Water Is Your Friend
Plastic push pins and retainers come out more easily if you lightly wet them. You don’t need special silicone sprays—plain water reduces friction and minimizes the chance of breaking the clips.
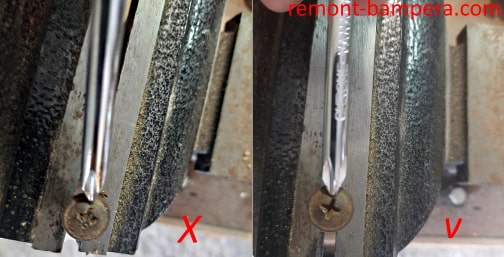
3. Countersunk Screws: Check the Slots
When removing screws in wheel arches (especially Torx, hex, or Phillips-head screws), make sure the slots are free of dirt. If the screwdriver doesn’t seat fully, you risk stripping the head. And extracting a damaged screw from plastic is no easy task.
4. Latches and Fasteners: Cleanliness Is Key
Before disassembly, thoroughly clean the bumper seams from sand and grime. Trapped debris can prevent clips from releasing smoothly, leading to plastic deformation. Pro tip: Wash the car, paying extra attention to connection points.
5. Teamwork or Paint Protection
Bumpers are large, and their corners can scratch the fenders during removal. To prevent this:
-
Work with a partner—one person holds the bumper while the other detaches the fasteners.
-
Apply painter’s tape along the fender edges—this protects the paint from accidental damage.
6. Temperature Matters: When to Play It Safe
Plastic is sensitive to temperature changes:
-
In freezing weather, it becomes brittle—increasing the risk of cracks.
-
In extreme heat, it can warp, and stretched fasteners may cause gaps when reinstalling.
7. Headlight Washer System: Prepare a Container
If your car has headlight washers, disconnecting the hoses will cause fluid to spill from the reservoir. Keep a small container handy to avoid soaking the engine bay.
8. Driving Without a Bumper: Secure the Splash Guards!
If you plan to drive without a bumper for a while, make sure the splash guards are firmly attached. Otherwise, at speed, they’ll get pressed against the wheels and wear through in just a few miles.
Final Thoughts
Removing a bumper requires attention and care. If you follow the instructions and consider these nuances, the process will go smoothly. And if you need model-specific guidance, check out our detailed illustrated manuals. Happy repairing!