-
-
-
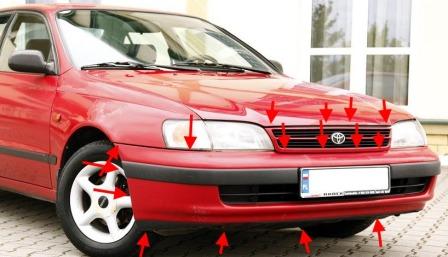
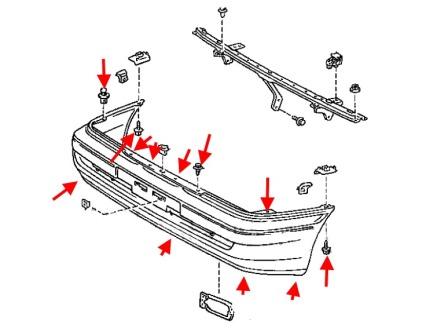
Front bumper
-open the hood and Unscrew the screws (spun down), remove the radiator grille.
-Unscrew the screws and take out the clips under the grille.
-remove the direction indicator.
-under the turn signal, Unscrew one screw on each side.
-around the bottom part Unscrew the screws (spun up).
-wrenched the wheel to the left or right side depending on which way we will analyse it first.
-wheel arches take out the rivets that attach the fender liner.
-move the wing flaps to the side and Unscrew one screw on each side that attach the angles to the wings.
-with the assistant remove a bumper from the guides themselves.
-remove the connector from the fog lamp (if any).
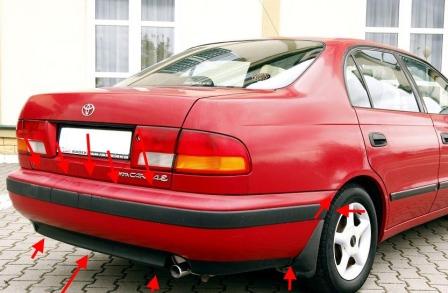
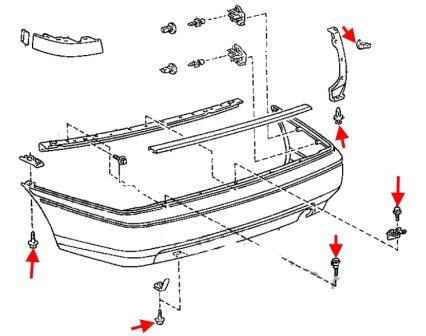
Rear bumper
Depending on the model year and model type, the attachment may vary.
-open the boot lid and Unscrew the five screws (spun down).
-wheel arches take out the rivets that attach the fender liner.
-move the wing flaps to the side and Unscrew one screw on each side that attach the angles to the wings.
-on the perimeter in the bottom part Unscrew the screws (spun up).
-assistant free the bumper from the clips in the wings and pulled off of the guide itself.

 English
  Italiano
  Français
  русский
  Deutsch
  Español