How to remove front and rear bumper Toyota Land Cruiser J100
Toyota Land Cruiser J100 (1997-2007)
Depending on the model year and model type, the attachment may vary.
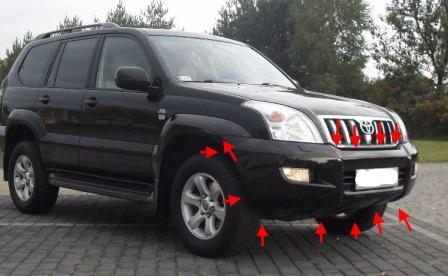
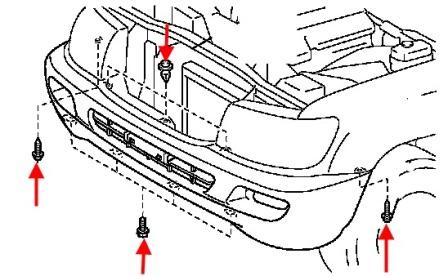
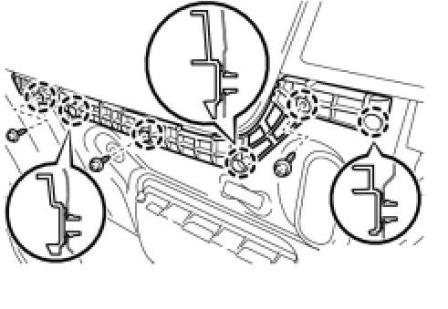
Front bumper
-open the hood and in the opening between the headlamps and pull out the caps (inserted upside down).
-around the bottom part Unscrew the screws (spun up).
-wrenched the wheel to the left or right side depending on which side we will analyze first.
-in the wheel arches to turn out screws and take out the clips holding the fender liner.
-attach the fender liner to the side and Unscrew one screw on each side (twisted from the bottom up) that attach the angles to the wings.
-assistant exempt corners of the latches in the wings and remove the bumper from the guides themselves.
-remove the connector from the fog lamp (if any).
-remove connector from the PDC (if any).
-if you have headlight washers, disconnected the hoses (so the liquid will not escape on earth, should prepare a special container).
-remove connectors with additional equipment (if available).
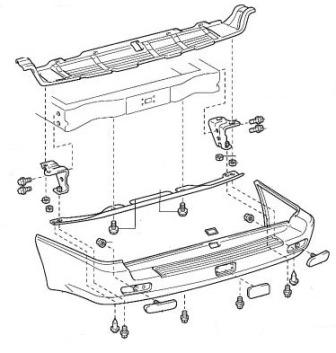
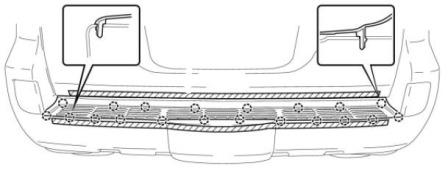
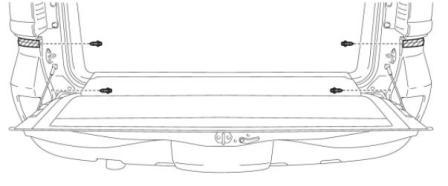
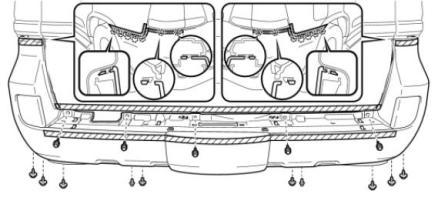
Rear bumper
Depending on the year of manufacture, model type, and country of the manufacturer of the attachment are very different. Below are diagrams of some mounting options.

 English
  Italiano
  Français
  русский
  Deutsch
  Español