
 English
  Italiano
  Français
  русский
  Deutsch
  Español
 Chevrolet Captiva C100/C140 (2006-2018)
The Chevrolet Captiva is a compact crossover produced from 2006 to 2018. The model was popular in Europe, Russia, Latin America, and some Asian countries but was never sold in the U.S. It was designed as an affordable family SUV with a spacious interior and practical features.
Production Years and Model Codes
The first-generation Chevrolet Captiva (model code C100) debuted in 2006 at the Paris Motor Show. Production began in South Korea at the GM Daewoo plant (later renamed GM Korea). The vehicle was based on the Theta platform, which was also used for the Opel Antara and Saturn Vue.
In 2011, the second generation (C140) was released, featuring a refreshed design and improved equipment. However, in 2018, Chevrolet discontinued the Captiva due to stricter environmental regulations and changes in the brand’s European strategy.
Names in Different Countries
Depending on the market, the model was sold under different names:
- Chevrolet Captiva – Main name in Europe, Russia, and Latin America.
- Holden Captiva – In Australia and New Zealand.
- Daewoo Winstorm – In South Korea (first generation).
- Chevrolet Captiva Sport – In the U.S., this name was used for a different SUV (the former Daewoo Tosca), which sometimes causes confusion.
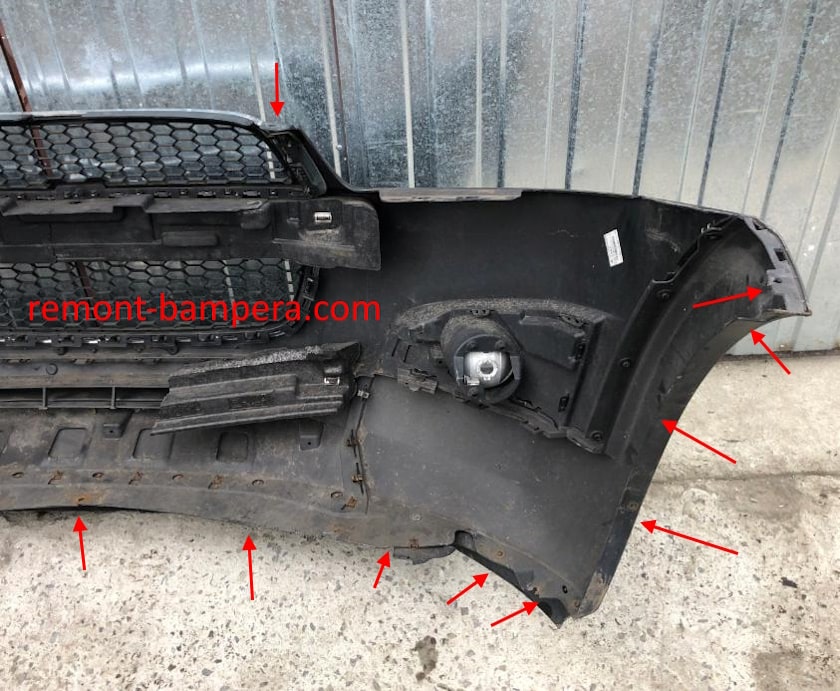
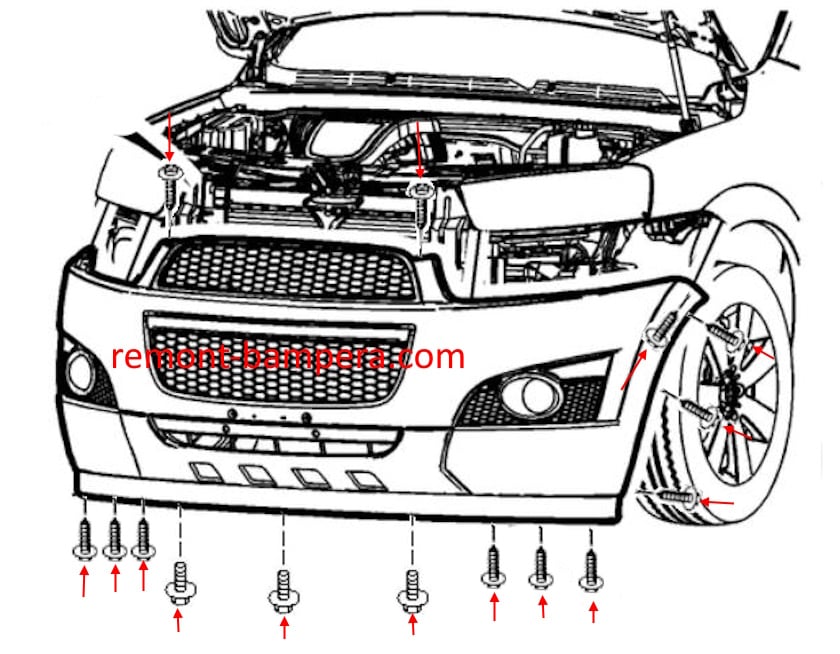
Mounting points vary slightly depending on the production year.
How to Remove the Front Bumper
Chevrolet Captiva I C100 (2006-2011)
- Open the hood.
- Remove the pistons under the hood and take off the cover.
- Unscrew the two screws securing the upper part of the front bumper.
- Between the grille and radiator, remove four pistons (inserted top to bottom).
- Unscrew three screws on each side and remove the headlights.
- Under the headlights, remove two pistons (inserted top to bottom).
- Along the perimeter of the lower part, unscrew the screws (fastened from bottom to top).
- Turn the wheels left or right, depending on which side you’re disassembling first.
- In the wheel arches, unscrew the screws securing the fender liners.
- Move the fender liners aside and unscrew one screw on each side (fastened from bottom to top) securing the bumper corners to the fenders.
- With an assistant, release the corners from the fender clips (pull toward yourself).
- Slide the bumper forward.
- Disconnect the fog light connectors (if equipped).
- If equipped with headlight washers, disconnect the hoses (prepare a container to catch any fluid).
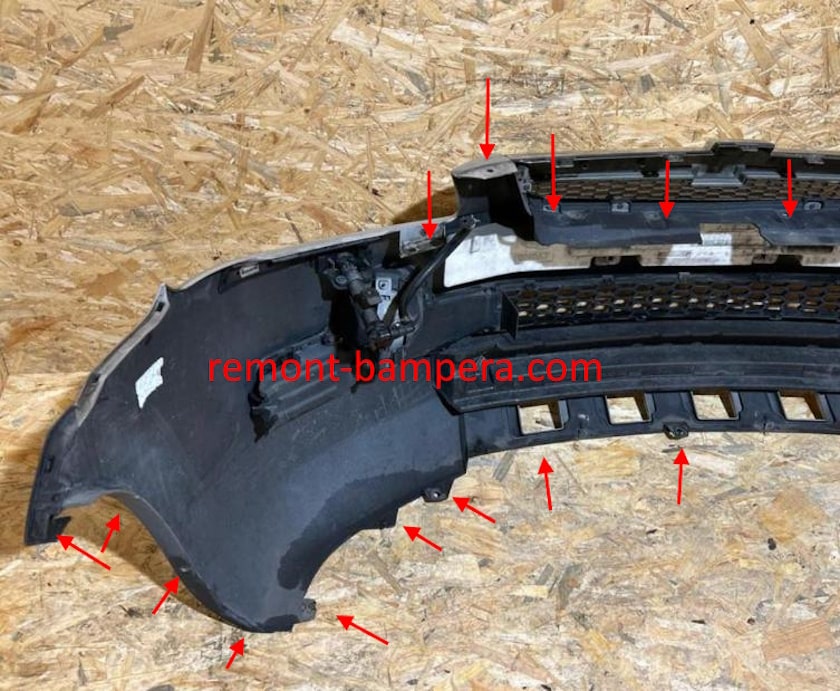
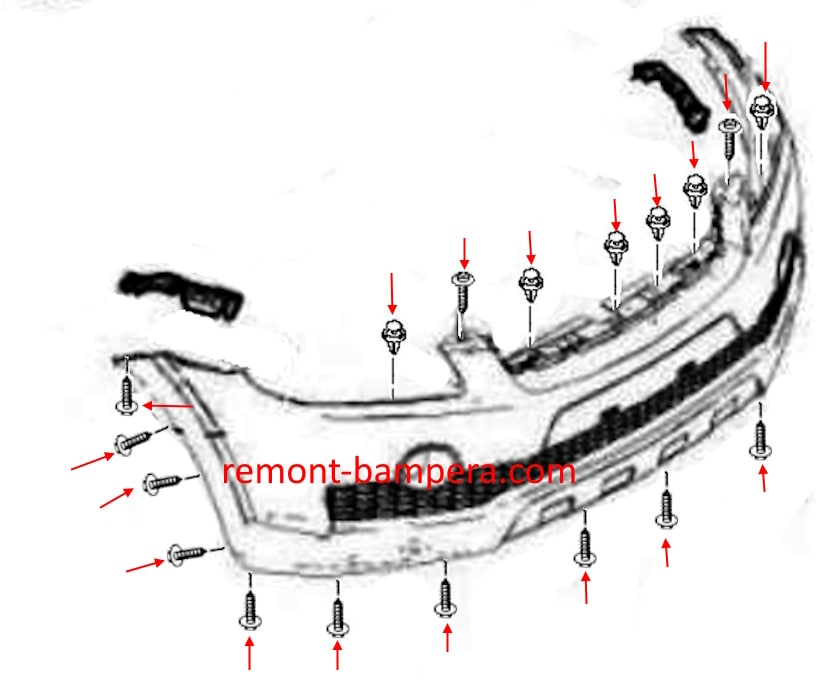
Chevrolet Captiva I C140 (2011-2018)
- Open the hood.
- Remove nine pistons under the hood and take off the plastic cover.
- Unscrew two screws (fastened top to bottom) securing the upper part of the front bumper.
- From underneath, unscrew six screws securing the fender liners and three 14 mm screws securing the lower part.
- Turn the wheels to the side.
- In the wheel arches, unscrew three screws on each side and move the fender liners aside.
- Behind the fender liners, unscrew one screw on each side (fastened from bottom to top) securing the corners to the fenders.
- Release the clips in the fenders (pull the corners toward yourself).
- Release the clips under the headlights.
- With an assistant, slide the bumper forward (watch for wires and hoses).
- Disconnect electrical connectors.
- If equipped, disconnect the headlight washer hoses.
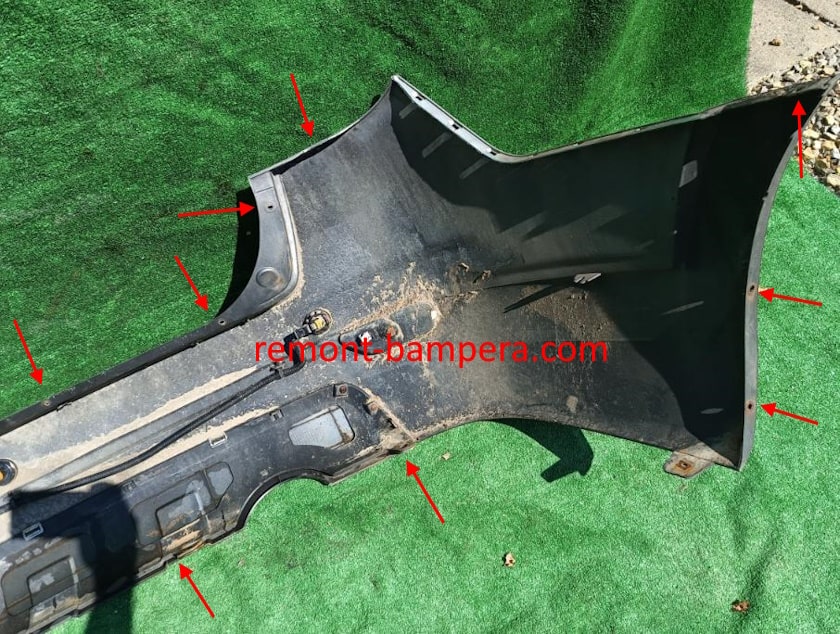
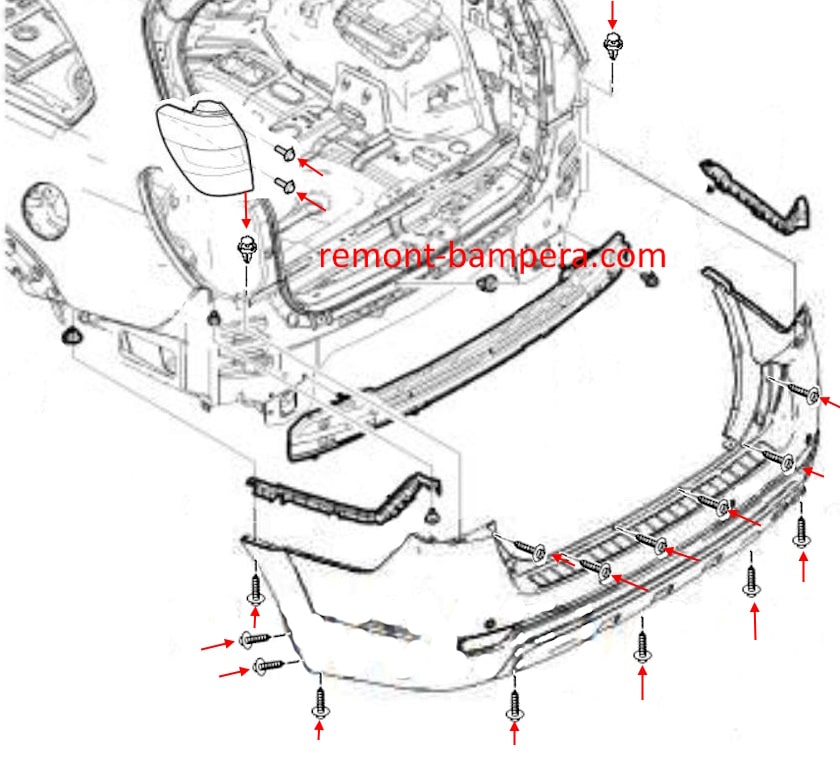
How to Remove the Rear Bumper
The rear bumper is attached similarly in both generations.
- Open the trunk lid.
- Unscrew two screws on each side and remove the taillights (held by clips; pull toward yourself).
- Under the taillights, remove two pistons (inserted top to bottom).
- Unscrew six screws in the trunk opening securing the upper part of the rear bumper.
- Unscrew six screws underneath (fastened from bottom to top) securing the lower part.
- In the wheel arches, unscrew four screws securing the fender liners and one screw on each side (fastened from bottom to top) securing the corners to the fenders.
- With an assistant, release the clips in the fenders (pull the corners toward yourself) and slide the bumper off the guides backward.
- Disconnect the parking sensor connector (if equipped).
Model Overview
First Generation (2006–2011)
- Design: Classic mid-2000s styling with pronounced wheel arches and a high stance.
- Engines: Gasoline (2.4L, 3.2L V6) and diesel (2.0L, 2.2L).
- Drivetrain: Front-wheel drive or all-wheel drive (with Dynamax system).
- Interior: Three-row (7-seat) or five-seat configurations.
Second Generation (2011–2018)
- Refresh: New grille, LED headlights, updated interior.
- Technical changes: Added a 2.2L turbo diesel (184 HP), revised suspension.
- Safety: Improved Euro NCAP rating (4 stars vs. 3 for the first gen).
Interesting Facts
- GM Platform: The Captiva shared many components with the Opel Antara but was cheaper, boosting its popularity in emerging markets.
- Absence in the U.S.: Despite Chevrolet’s global presence, the Captiva was never sold in the U.S. due to competition with larger domestic SUVs.
- Sport Version: In 2007, South Korea released the Daewoo Winstorm MaXX—a coupe-like variant with a shorter wheelbase.
- Russian Production: From 2012 to 2015, second-gen Captivas were assembled at GM’s St. Petersburg plant.
- Successor Models: In Europe, it was replaced by the Chevrolet Equinox; in Asia, by the Traverse.
Pros and Cons of the Chevrolet Captiva
Advantages:
- Spacious interior (especially the 7-seat version).
- Affordable on the used market.
- Good off-road capability for its class.
Disadvantages:
- High fuel consumption (gasoline versions).
- Unreliable automatic transmission (especially early models).
- Expensive maintenance for diesel engines.
Conclusion
The Chevrolet Captiva is a typical 2000s crossover—practical but unremarkable. While not iconic, it remained popular due to its affordability and versatility. Today, it can be found on the used market, appealing to buyers seeking a budget-friendly, functional SUV.