
 English
  Italiano
  Français
  русский
  Deutsch
  Español
 General Description
The first-generation Volkswagen Crafter is a large van that replaced the LT model in 2006. Developed in partnership with Mercedes-Benz (as part of the collaboration with Daimler AG), the Crafter I became one of the key commercial vehicles in Volkswagen's lineup. It offered a payload capacity of up to 3.5 tons, a spacious interior, and reliable diesel engines.
Production Years and Platform
The first Volkswagen Crafter was produced from 2006 to 2016. In 2017, the second generation was introduced, now on Volkswagen's own platform.
Interestingly, the Crafter I was built on the same platform as the Mercedes-Benz Sprinter (W906). Production took place at Daimler's plant in Düsseldorf (Germany) as well as in Argentina. This collaboration allowed Volkswagen to quickly enter the large van market using the proven Sprinter design.
Modifications and Body Styles
The Volkswagen Crafter I was available in several body styles:
- Panel Van – Standard cargo compartment without windows, available in different lengths and roof heights.
- Minibus – Passenger version with windows and seating (up to 17 seats).
- Chassis Cab – Designed for specialized superstructures (refrigerators, tanks, etc.).
- Compact Panel Van – A shorter-wheelbase version.
Available wheelbases: 3.0 m (short), 3.7 m (medium), 4.3 m (long). Roof height ranged from 2.3 to 2.8 m, allowing customers to choose a model tailored to their needs.
Engines and Transmissions
The Crafter I was equipped exclusively with diesel engines:
- 2.0 TDI (100–140 HP) – The base option, suitable for light cargo transport.
- 2.5 TDI (136–163 HP) – The main engine with a good power reserve.
- 3.0 TDI V6 (180 HP) – The top-tier engine for heavily loaded versions.
Transmission options:
- 5- or 6-speed manual;
- 5-speed automatic (Tiptronic) – Available in higher trim levels.
Drivetrain options included rear-wheel drive or all-wheel drive (4MOTION). AWD versions were valued for their off-road capability and were often used in special-purpose vehicles (ambulances, emergency services).
Bumper Plastic Marking: >PP<
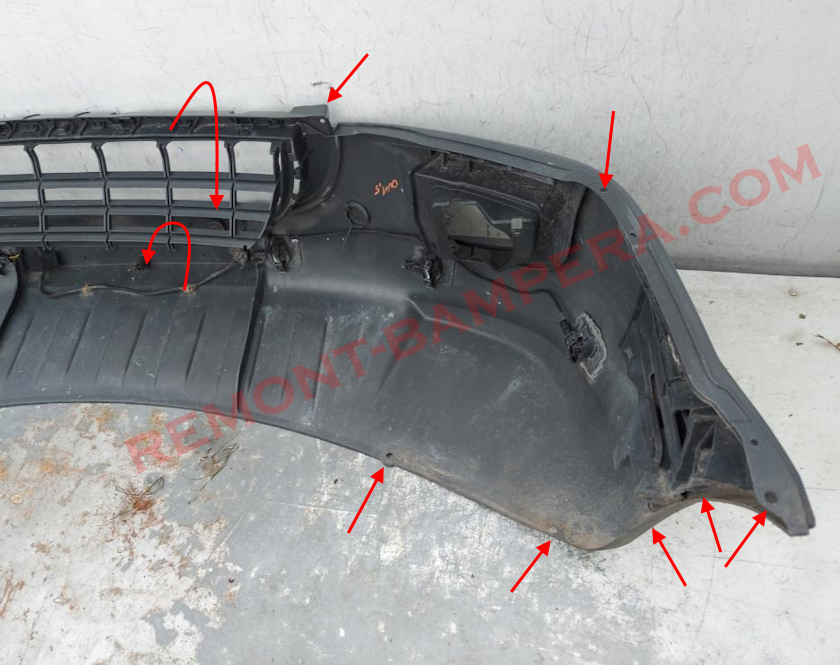
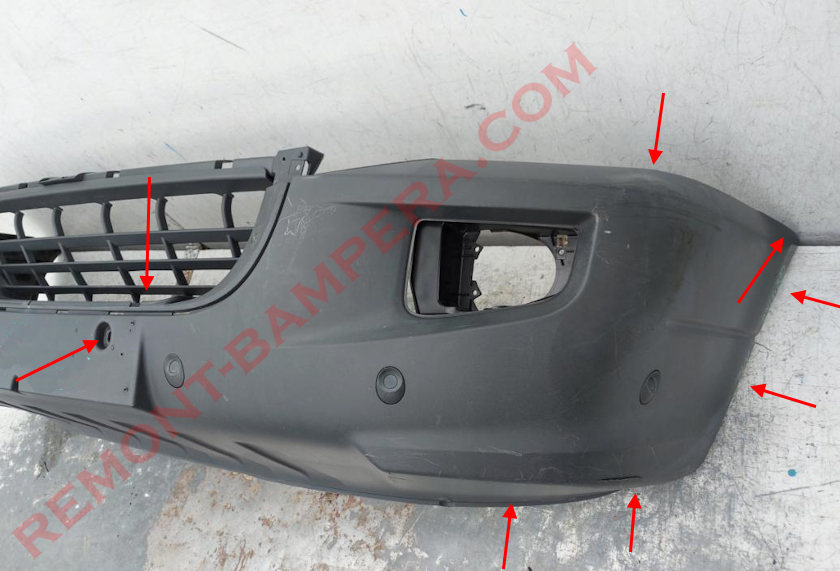
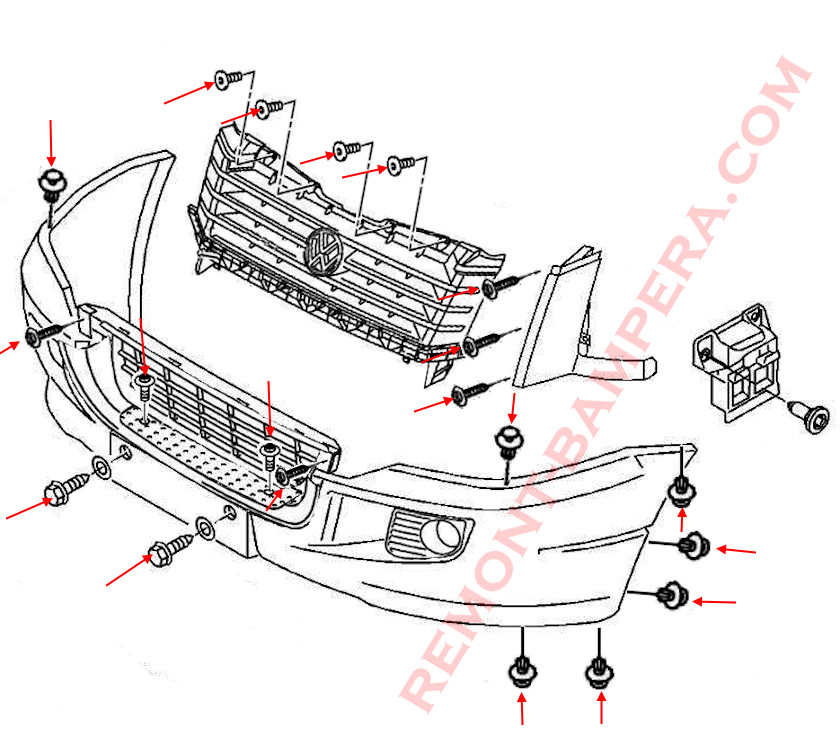
How to Remove the Front Bumper
- Open the hood.
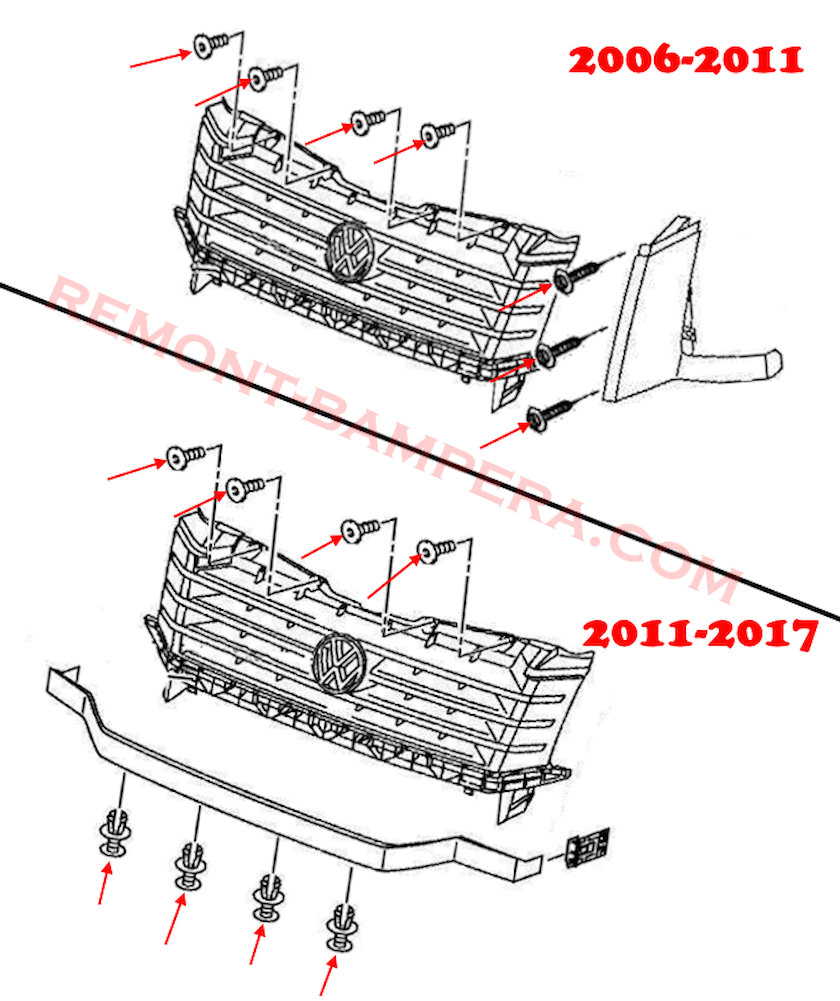
- Under the hood, unscrew the four screws securing the radiator grille.
- (2006–2011) Remove the radiator grille (pull upward). Unscrew three screws on each side and remove the trim near the headlights.
- (2011–2017) Pull out four push pins (inserted from bottom to top), release the clips in the fenders (use a flathead screwdriver to press the latch), and remove the trim under the radiator grille and headlights. Then remove the radiator grille.
- Through the headlight openings, pull out two push pins securing the sides to the fenders.
- Unscrew two screws (inserted from top to bottom) securing the upper part of the front bumper.
- Remove the license plate along with its frame and unscrew two screws underneath.
- From underneath, pull out two push pins on each side.
- Turn the wheels outward, depending on which side you are disassembling.
- In the wheel arches, pull out three push pins on each side securing the fender liners (front part and sides).
- With an assistant, pull the bumper forward off the guides in the fenders (watch for wiring).
- Disconnect electrical connectors (if present).
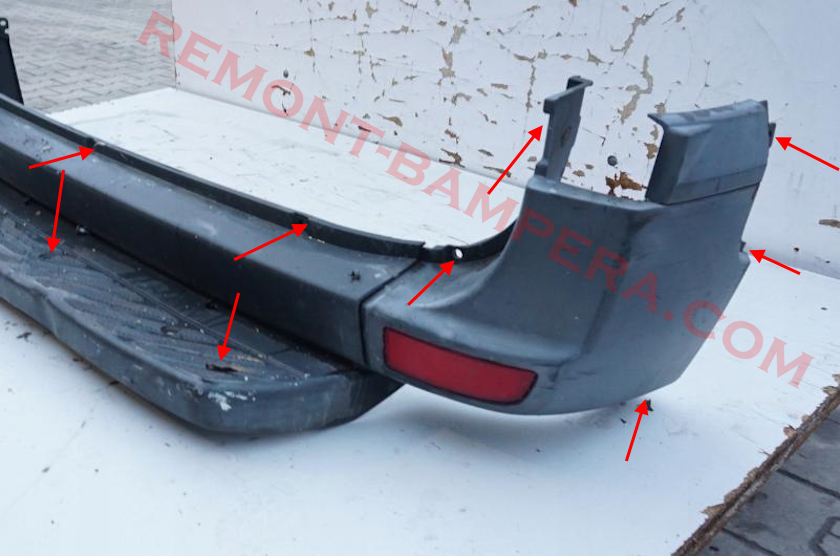
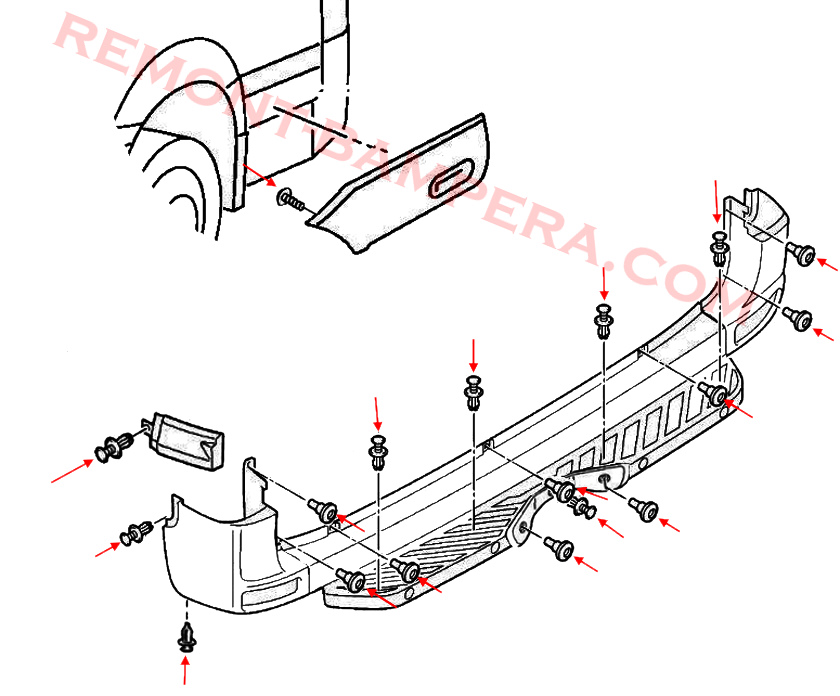
How to Remove the Rear Bumper
- Open the rear doors.
- In the rear door opening, unscrew seven screws securing the upper part of the rear bumper.
- Pull out four push pins in the step (inserted from top to bottom).
- (If equipped) In front of the tow hook, pull out one push pin and unscrew two screws.
- In the wheel arches, unscrew one screw on each side and remove the protective moldings (held by internal push pins; pull the edge toward you).
- Under the protective moldings, pull out two push pins on each side.
- Pull out two push pins at the edges from underneath.
- With an assistant, pull the bumper backward (watch for wiring).
- Disconnect electrical connectors.
Comfort and Safety
Despite its commercial focus, the Crafter I offered a decent level of comfort:
- Adjustable steering wheel and driver’s seat;
- Air conditioning (optional climate control);
- Power windows and central locking;
- Bluetooth audio system (in later versions).
Safety features included:
- ABS and ESP;
- Airbags (optional side airbags);
- Parking sensors (in premium trims).
Interesting Facts
- Shared Roots with the Sprinter – Many parts (suspension, body components, electronics) were interchangeable with the Mercedes-Benz Sprinter, simplifying repairs.
- Military Modifications – The Crafter I was used as a base for military vehicles, including mobile command posts.
- Hybrid Version – In 2008, Volkswagen presented the Crafter Hybrid concept, but it never entered mass production.
- Popularity in Emergency Services – The van was used as an ambulance, police patrol vehicle, and even a mobile lab.
- Record Reliability – Some Crafter I models exceeded 500,000 km without major engine repairs.
Conclusion
The first-generation Volkswagen Crafter was a successful business solution, combining German reliability and practicality. Thanks to powerful diesel engines, a spacious body, and shared components with the Mercedes Sprinter, it gained popularity in Europe and other regions. Despite the arrival of a new generation, used Crafter I models remain in demand due to their robust construction and availability of spare parts.