Depending on the year of release, country of origin and the type of body mounting options bumpers very much.
Below are the basic patterns of attachment. Arrows indicate the location of screws, latches, caps and nuts.
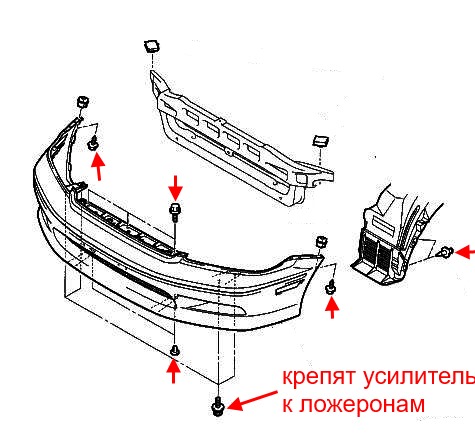
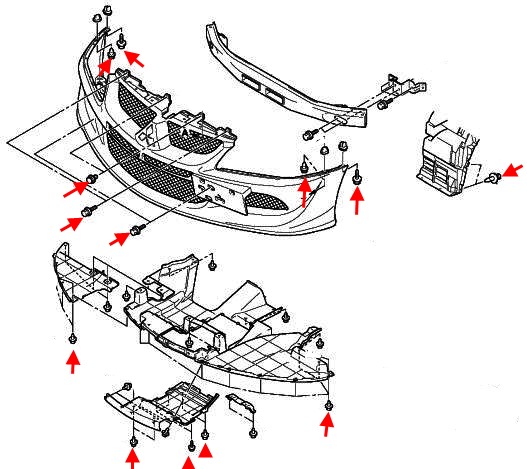
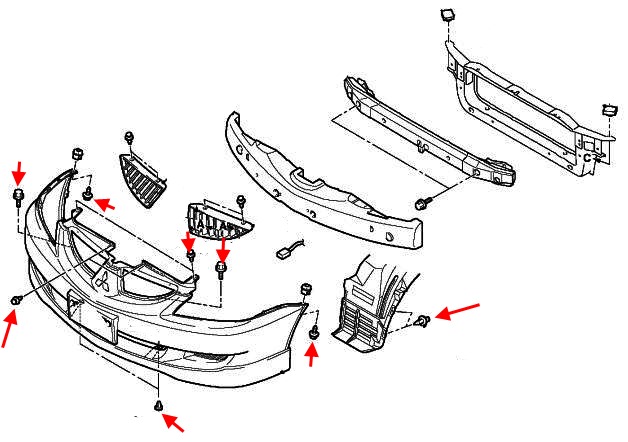
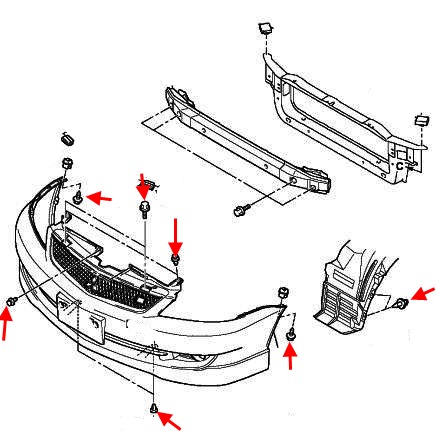
Front bumper
The bumper is removed together with the metal amplifier. Remove the grille, unscrew the screws on it. In the wheel arches, we take out the caps and release the fender liner (front). Behind the fender liner, unscrew one screw on each side that attach the corners of the bumper to the wings. unscrew the screws in the lower grille of the bumper. We take out the caps from the bottom. From the side of the engine compartment, unscrew the four bolts that secure the bumper amplifier to the body.
Under the hood, unscrew the four screws that secure the upper part of the bumper. We unscrew the two screws in the lower grille. We take out the caps in the wheel arches and move the fender liner. Behind the fender liner, we unscrew two screws (twisted from the bottom up) that attach the sides of the bumper to the wings. We take out ten caps from the bottom side (inserted from the bottom up).
Under the hood, unscrew the two screws and take out the two pistons. We take out four pistons, release them from the latches and remove the radiator grilles. Unscrew the two screws behind the bars. We take out the caps that attach the liner and unscrew the two screws that attach the corners of the bumper to the wings. Unscrew the screws from the bottom.
We unscrew the four screws and pull out the two pistons that secure the upper part of the bumper. Unscrew the screws from the bottom. In the wheel arches, we take out the caps and unscrew one screw (spun upwards) that secure the sides of the bumper. We release the latches in the wings.
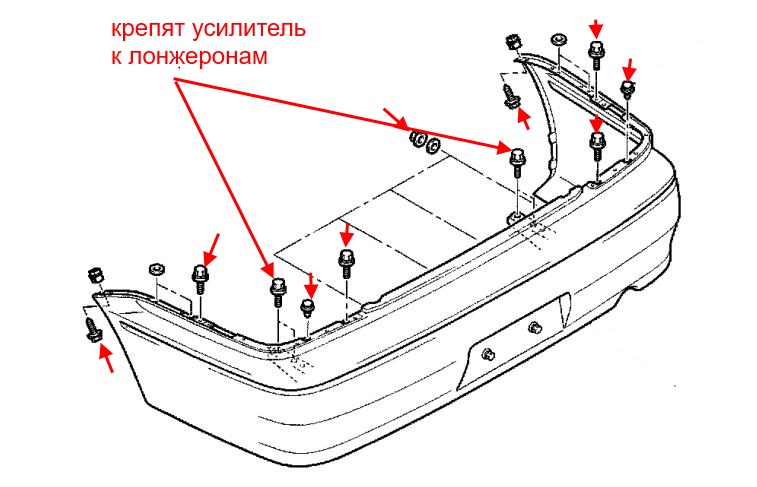
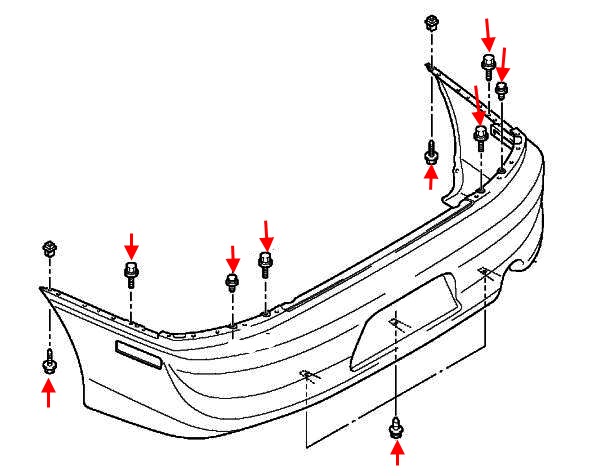
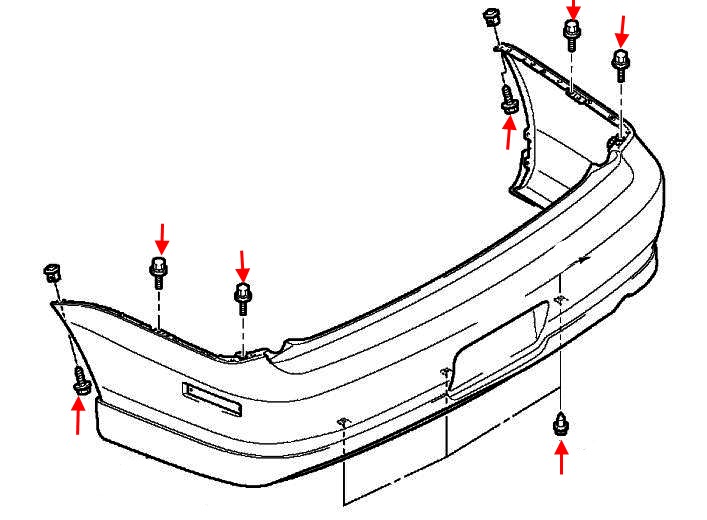
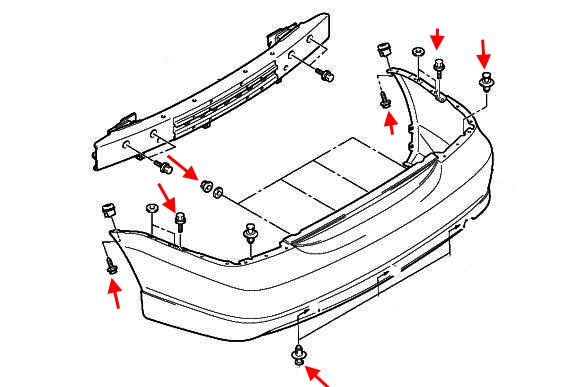
The bumper can be removed either with or without a metal reinforcement. If with an amplifier, then unscrew the four bolts that secure it to the body. If without an amplifier, then unscrew the screws and nuts that secure the amplifier to the bumper. We unscrew the screws in the inner part of the wings. We unscrew the screws in the wheel arches.
Remove the rear lights and unscrew the screws under them. We unscrew the screws behind the skins, in the inner part of the wings. Unscrew the screws from the bottom. We unscrew the screws in the wheel arches.
Unscrew the two screws under the rear lights. We unscrew the two screws from the trunk that attach the bumper to the wings. We take out three pistons from the bottom. We unscrew one screw on each side (spun from bottom to top) that attach the corners of the bumper to the wings.
Remove trunk lining. Behind the skins, unscrew the four nuts and two screws. We remove the rear lights and pull out the caps behind them. We unscrew the screws that attach the rear fender liner and the two screws that attach the corners of the bumper to the wings. We take out the caps from the bottom.

 English
  Italiano
  Français
  русский
  Deutsch
  Español