How to remove front and rear bumper Mitsubishi L200/Triton III
Mitsubishi L200/Triton III (1996-2006)
Depending on the year of manufacture, the attachment points may vary slightly.
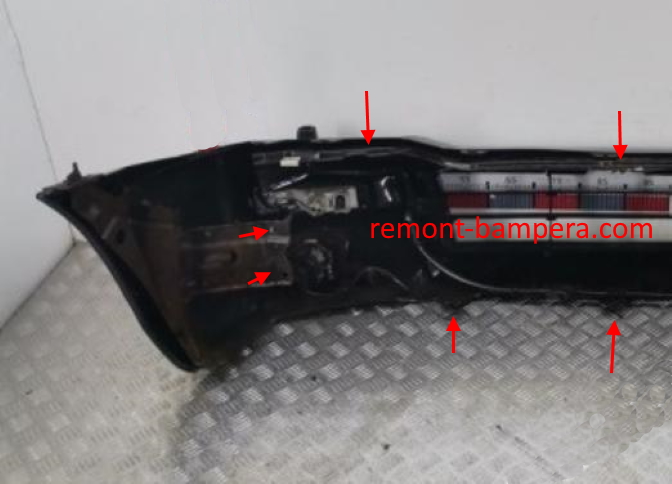
Front bumper
-before dismantling the bumper, you need to disconnect the connectors for the fog lights and direction indicators, if there are headlight washers, disconnect the rods.
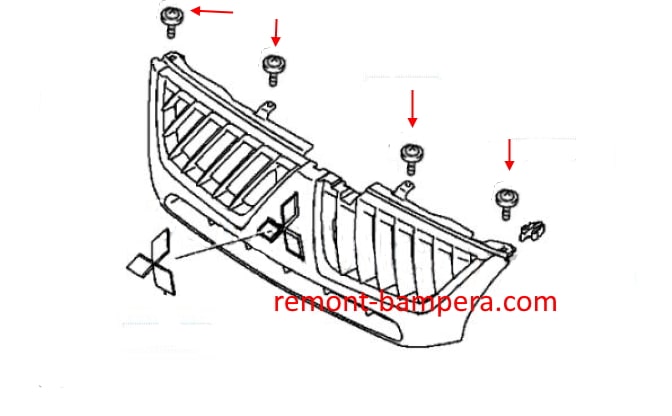
-open the hood.
-under the hood, Unscrew the four screws, release them from the latches and remove the grille.
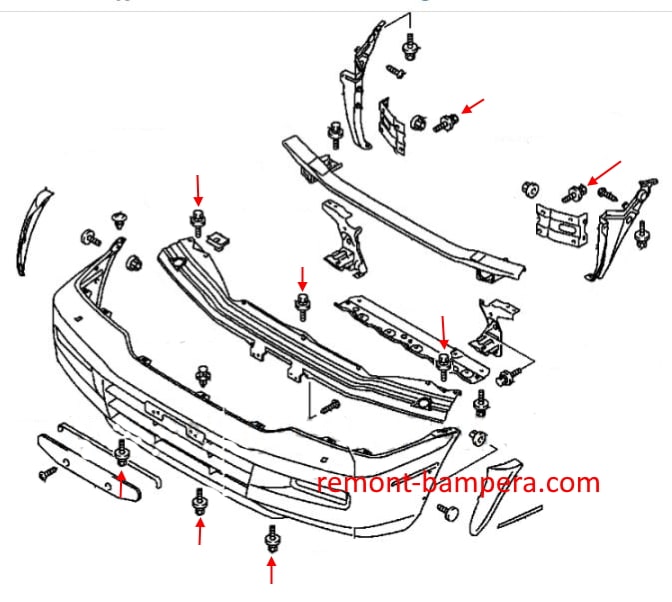
-unscrew the bolts and remove the headlights (to remove the left headlight, you need to remove the washer reservoir).
-behind the headlights and grille, unscrew the three bolts (spun down) that secure the metal bumper reinforcement.
-from the bottom side, Unscrew the three bolts (spun up) that secure the lower part.
-turn the wheels to the side.
-in the wheel arches, unscrew two screws on each side that secure the amplifier brackets to the body.
-with an assistant, gently pull the bumper forward.

 English
  Italiano
  Français
  русский
  Deutsch
  Español