-
-
-
Mitsubishi Diamante II (1995-2005)
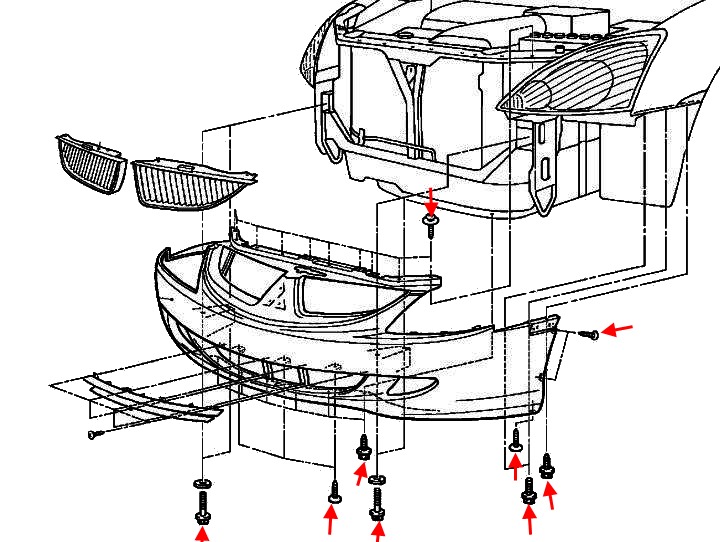
Front bumper
-open the hood.
-under the hood, unscrew the ten screws (spun down) that secure the top.
-from the bottom, unscrew the seven screws that secure the lower part of the bumper.
-turn the wheels, depending on which side we will disassemble.
-in the wheel wells, unscrew two screws on each side that secure the fender liner (front).
-move the fender liner to the side and unscrew three screws on each side (spun up) that attach the corners to the wings.
-from the side of the engine compartment, unscrew the four bolts that secure the bumper amplifier to the body.
-with an assistant, gently pull the bumper forward (look behind the wires).
-disconnect electrical connectors (if any).
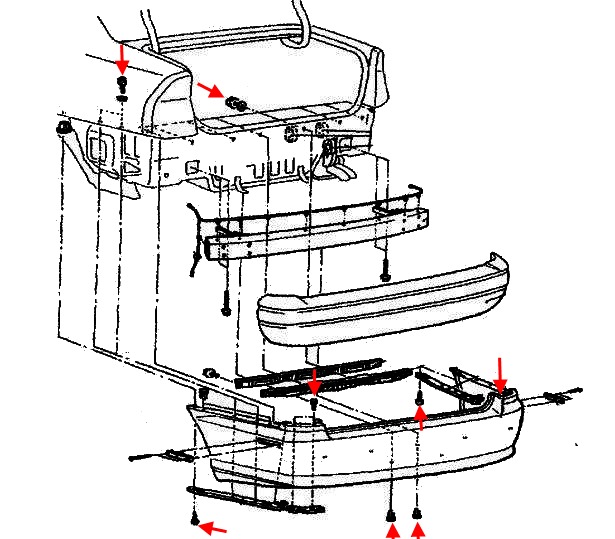
Rear bumper
-open the trunk lid.
-in the trunk, remove the trim.
-for the skins, unscrew the screws in the inside of the wings and the rear panel.
-remove the rear lights.
-under the rear lights, unscrew the screws.
-at the bottom of the bumper take out the caps (inserted from the bottom up).
-in the wheel arches, we release the fender liner (rear).
-unscrew one screw on each side that attach the corners of the bumper to the wings.
-with an assistant, pull the rear bumper back (look for the wires).
-disconnect electrical connectors (if any).

 English
  Italiano
  Français
  русский
  Deutsch
  Español