-
-
-
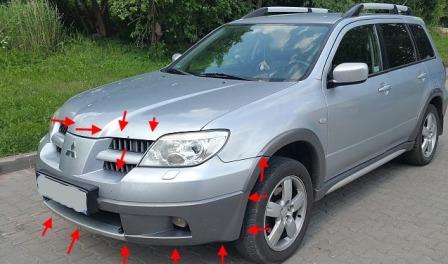
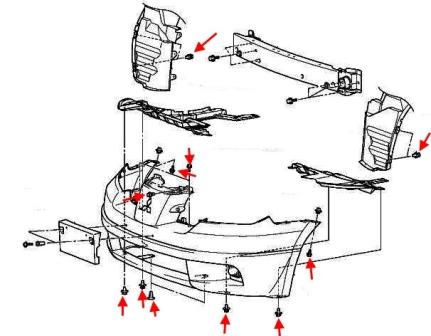
Front bumper
-open the hood.
-under the hood take out the caps and Unscrew the screws that attach the grille and the upper bumper section.
-remove the grille (held on latches).
-Unscrew the screws under the radiator grills.
-wrenched the wheel depending on which side we understand.
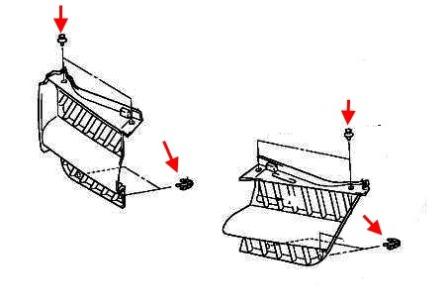
-wheel arches take out the rivets that attach the fender liner.
-remove the fender liner to the side and Unscrew one screw on each side (spun upwards) holding the corners of the bumper to the wings.
-take out the caps and Unscrew the screws that attach the lower part.
-with the assistant gently pulls the bumper forward (don't want to break the wires and hoses).
-remove the connectors from the equipment (if any).
-switched the washer hoses (may leak the fluid).
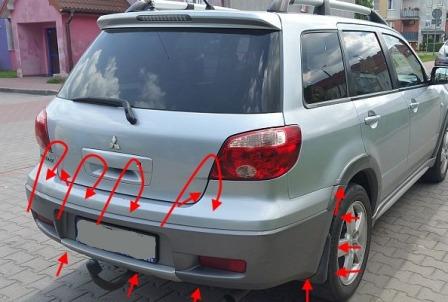
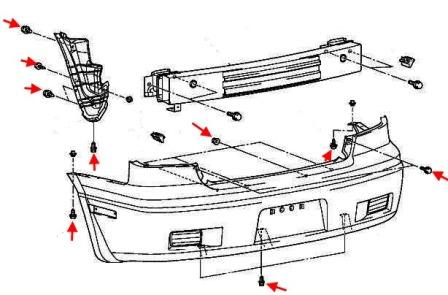
Rear bumper
-open the trunk lid.
-in the opening of the trunk, Unscrew the screws.
-remove the plastic cover of the rear panel.
-the casing Unscrew the four nuts.
-take out the caps on the perimeter of the lower part (inserted from the bottom up).
-in the wheel wells, Unscrew the screws and take out the rivets that attach the fender liner and mud flaps.
-for wheel arch liners Unscrew one screw on each side (spun upwards) holding the corners of the bumper to the wings.
-with the assistant gently pulls the bumper back.
-remove the connectors from the equipment (if any).

 English
  Italiano
  Français
  русский
  Deutsch
  Español