
 English
  Italiano
  Français
  русский
  Deutsch
  Español
 Renault Master 3 (2010-2024)
If you're looking for a reliable commercial vehicle that can handle any task, the Renault Master 3 is an excellent choice. This model combines power, practicality, and modern technology, remaining one of the leaders in its class.
Body Types: For Every Need
The Master 3 offers several body configurations:
- Panel Van – the classic cargo solution. Available in three lengths (L1, L2, L3) and three heights (H1, H2, H3) with a cargo volume from 8 to 17 m³, suitable for both small shipments and bulky loads.
- Chassis Cab – ideal for custom builds (refrigerated trucks, campers, utility bodies, etc.).
- Combi – passenger version (up to 9 seats) with convertible cargo/passenger space.
- Platform Cab – open bed for construction, delivery services, and special equipment.
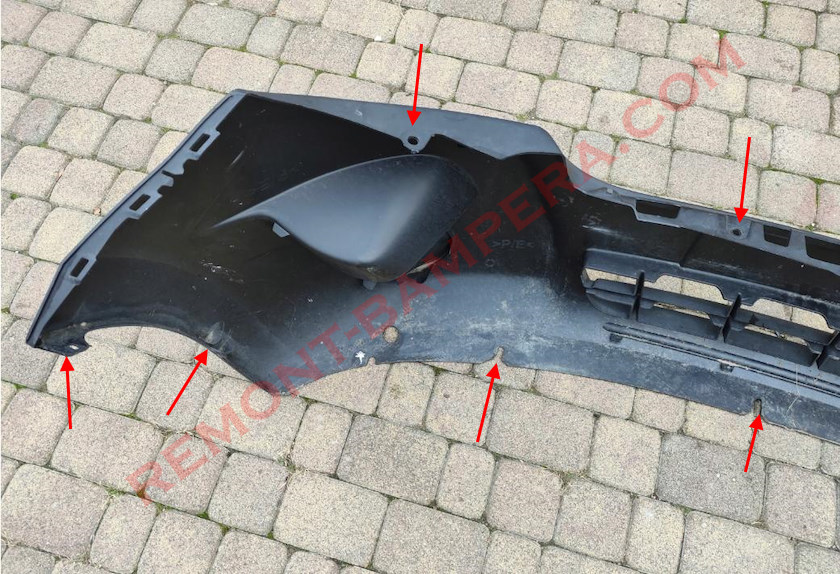
Bumper Material: Polyethylene (marked >P/E<).
Mounting points may vary depending on model year and configuration.
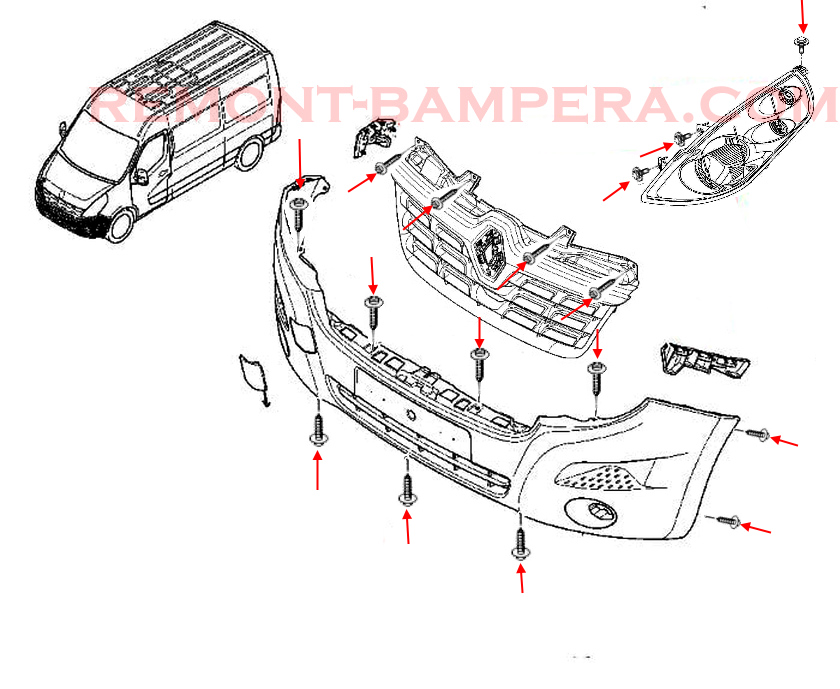
Front Bumper Removal
Preparation and Grille Removal
- Open and securely prop the hood.
- Locate and remove the four screws securing the radiator grille.
- Carefully release the grille from its clips and remove it.
Headlight Removal
- On each side, remove the three screws securing the headlights.
- Disconnect electrical connectors and remove the headlights.
Upper Bumper Fasteners
- Below the grille, locate four vertical screws securing the top of the bumper - remove these.
Lower Fasteners
- Under the bumper, find three screws - loosen them a few turns (no need for full removal).
Side Fasteners
- In wheel arches, remove four screws (two per side).
- Release plastic clips in fenders by firmly pulling the bumper outward.
Bumper Removal
- Work with an assistant: The bumper needs to be carefully slid forward.
- If equipped with sensors/cameras, disconnect wiring first.
Reinstallation
- Reverse the removal process. Ensure all clips and connectors are properly engaged.
Tip: When removing for the first time, proceed carefully to avoid damaging plastic clips.
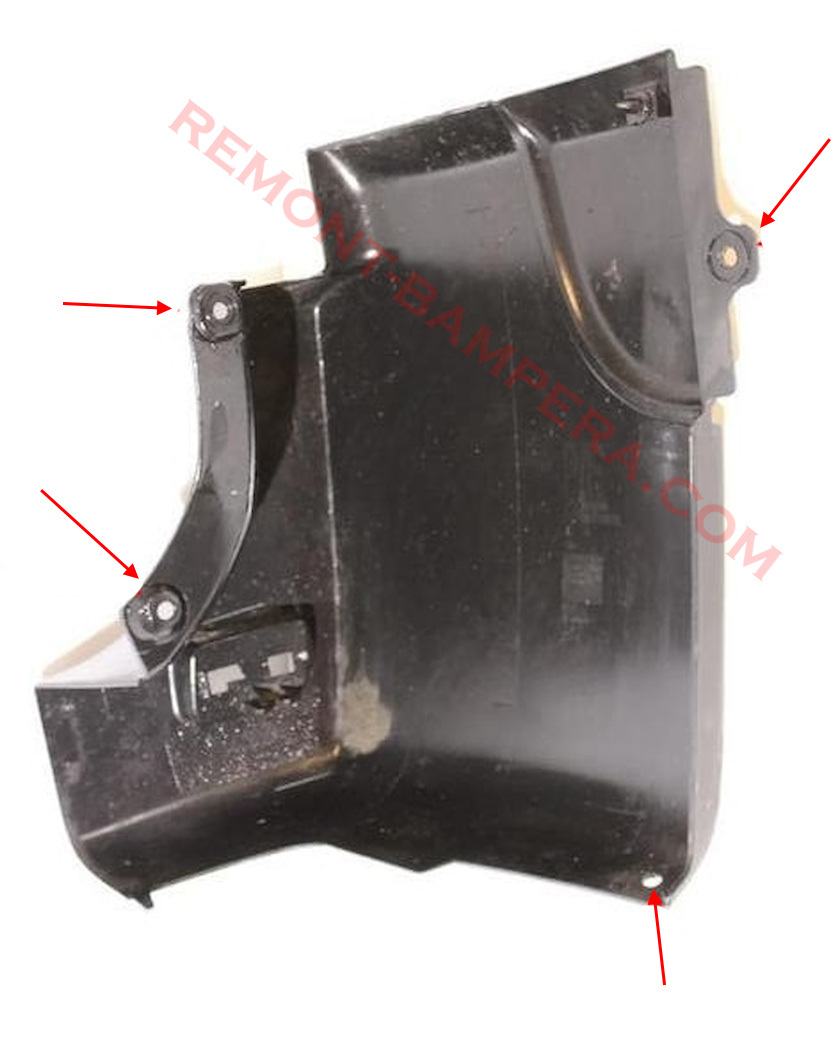
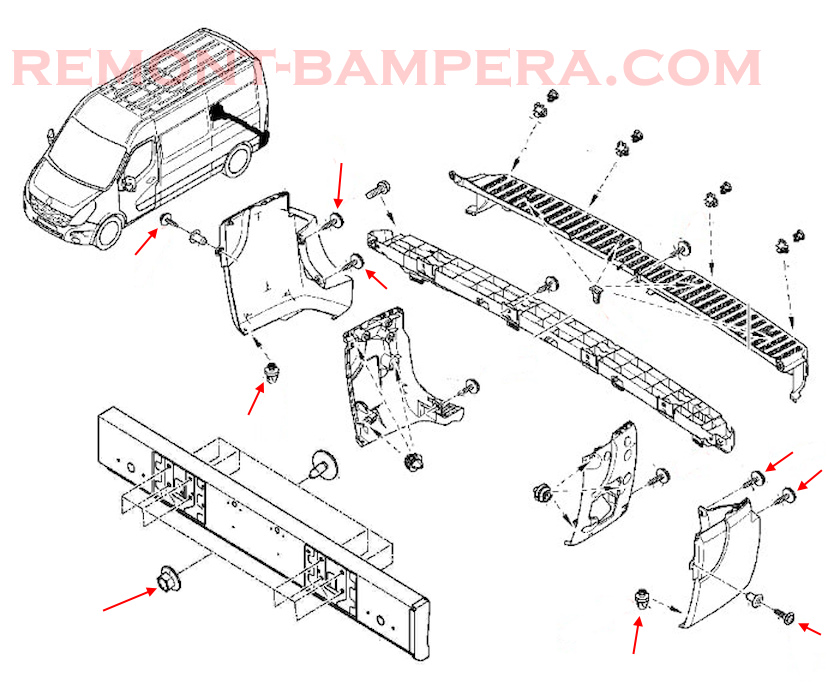
Rear Bumper Removal
The rear bumper consists of three sections:
- Center section: Secured by four nuts to the rear panel.
- Side sections: Each held by three bolts and one rivet.
The process is straightforward but may be complicated by rusted fasteners.
Technical Features: Power and Efficiency
The Master 3 features modern 2.3L diesel engines (120-180 HP) with combined fuel economy around 8-9 L/100 km. Available with:
- Manual or Automatic (6-speed EDC) transmission
- Front-wheel or All-wheel drive for tough conditions
Interesting Facts About Renault Master 3
- 40 Years of Evolution: First launched in 1980, becoming one of Europe's most popular vans.
- Electric Version (Master E-Tech): Up to 200 km range with 1.6-ton payload - ideal for urban deliveries.
- Smart Features: Adaptive cruise, emergency braking, blind-spot monitoring, and even self-parking in top trims.
- Heavy-Duty Capability: Some variants support up to 4.5 tons (GVWR).
Why Choose Master 3?
Reliability - Proven platform and durable components
Versatility - Dozens of configuration options
Comfort - Spacious cabin with excellent noise insulation
Bottom Line: The Renault Master 3 isn't just a van - it's a versatile work tool that helps businesses operate efficiently. Whether for deliveries, construction, or passenger transport, it delivers outstanding performance!