
 English
  Italiano
  Français
  русский
  Deutsch
  Español
 Mazda Xedos 9: History, Modifications, and Features
The Mazda Xedos 9 is a flagship sedan produced by the Japanese automaker from 1993 to 2002. Positioned as a premium vehicle, it was part of the Xedos sub-brand, created by Mazda to compete with European marques such as BMW, Mercedes-Benz, and Audi.
Names and Markets
In Japan, the car was sold as the Eunos 800, as the Eunos brand was used by Mazda for premium models in the domestic market. In Europe, Australia, and some other countries, it was known as the Mazda Xedos 9, while in North America, it was marketed as the Mazda Millenia.
Production Years and Model Code
Production of the Mazda Xedos 9 began in 1993, with the final units rolling off the assembly line in 2002. The platform was designated as TA (first generation, 1993–1998) and TA-II (facelift, 1998–2002). The body code was JE.
Body Type and Modifications
The Xedos 9 was offered exclusively as a 4-door sedan. Key modifications included:
- 2.0 V6 – the base version with a 2.0-liter engine (145 hp);
- 2.5 V6 – a more powerful variant with a 2.5-liter engine (170 hp);
- 2.3 Miller Cycle – an innovative Miller Cycle engine (210 hp) known for its increased efficiency.
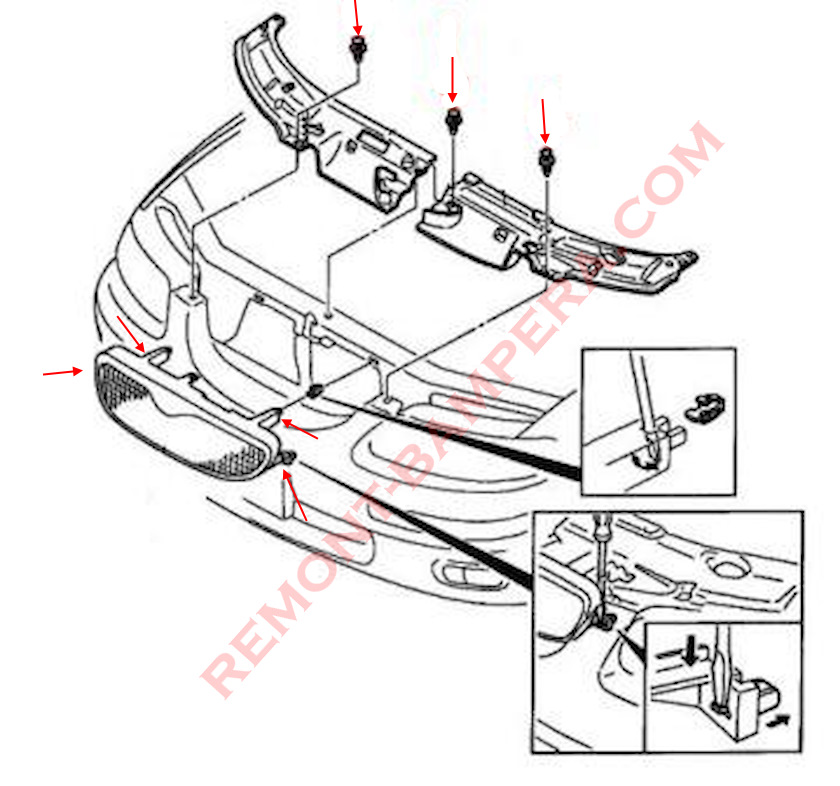
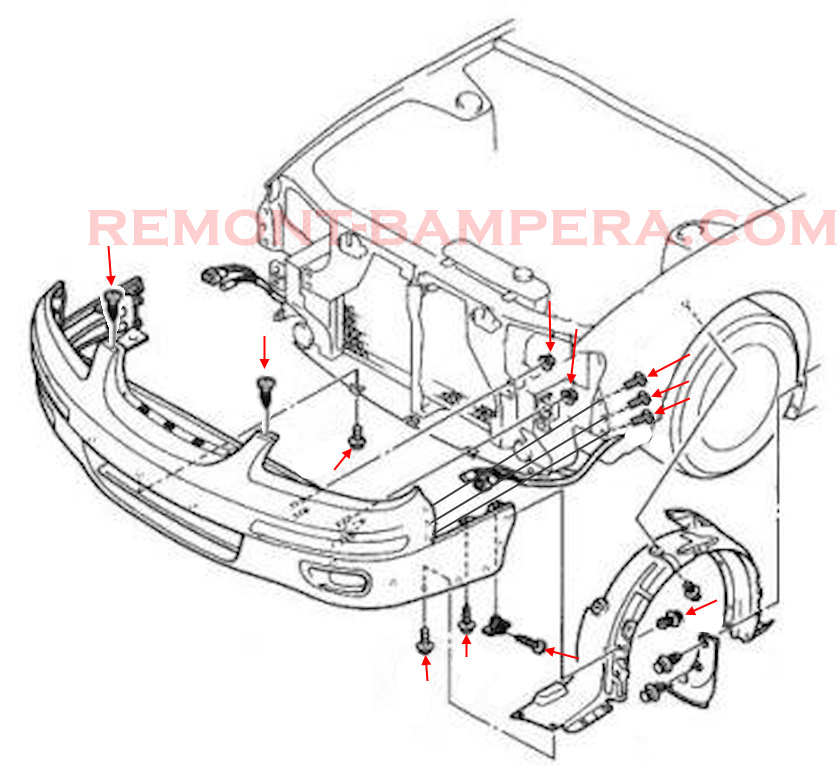
How to Remove the Front Bumper
- Open the hood.
- Remove the clips and take off the trim pieces.
- Use a flathead screwdriver to release the fasteners and remove the radiator grille.
- Remove the clips, detach from the latches, and take out the turn signals.
- Unscrew three bolts on each side and remove the headlights.
- Along the lower edge, unscrew the bolts inserted from bottom to top.
- In the wheel arches, unscrew the bolts securing the fender liners to the bumper.
- Behind the fender liners, unscrew two bolts on each side (inserted from bottom to top). Then, remove three additional bolts deep inside the wheel wells using a socket wrench with an extension.
- Now, unscrew the nuts securing the bumper’s metal reinforcement to the body from the engine bay side.
- With an assistant, carefully pull the bumper forward, paying attention to wires and hoses.

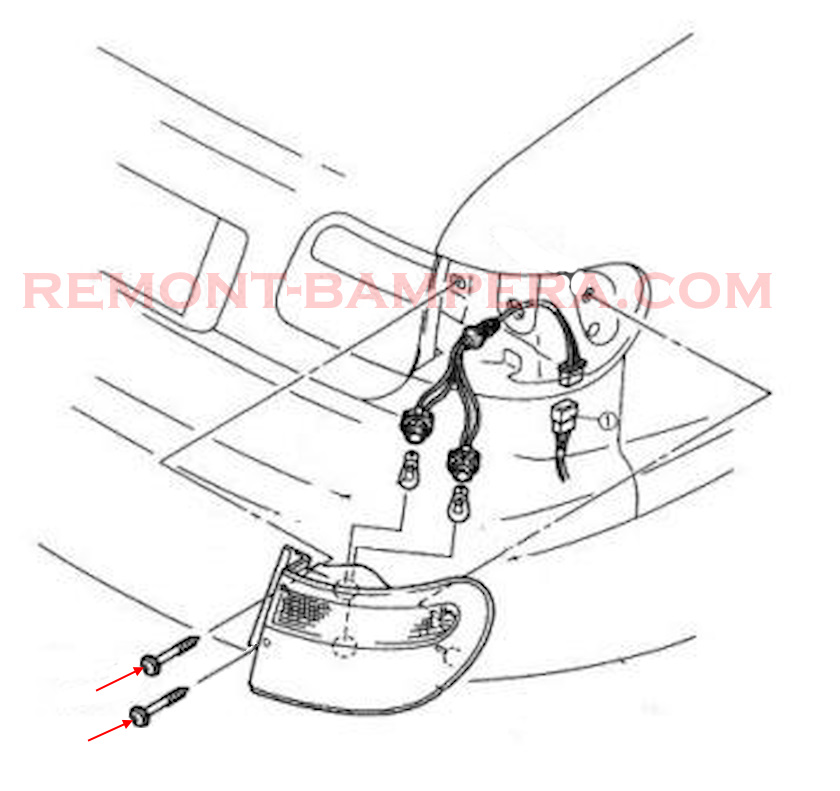
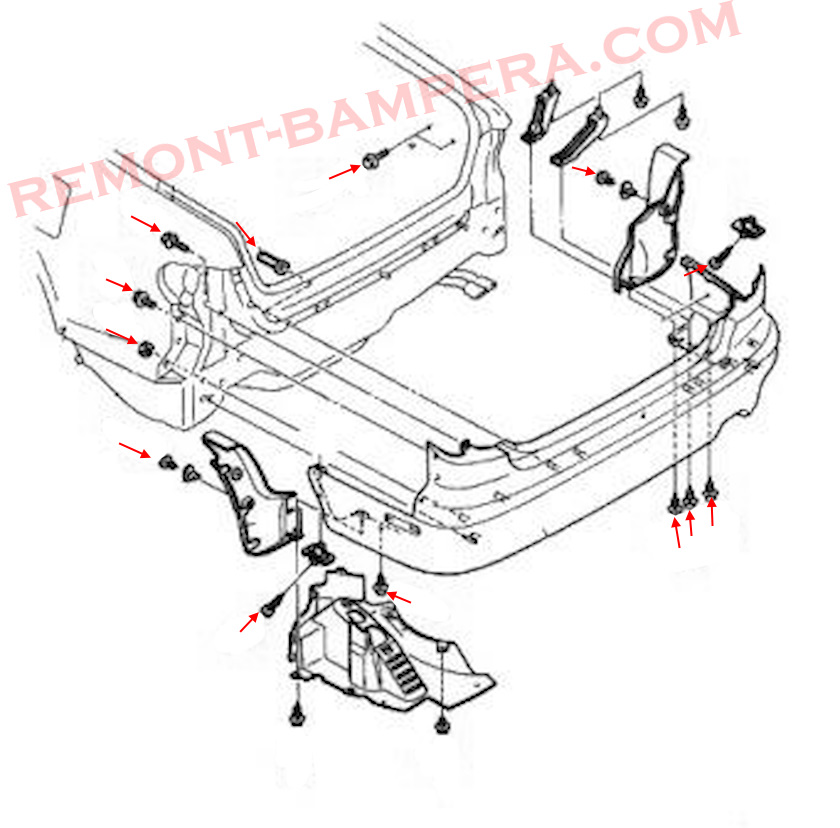
How to Remove the Rear Bumper
- Open the trunk lid.
- Unscrew two bolts on each side, release from the fasteners, disconnect the wiring harnesses, and remove the taillights.
- Unscrew the bolts from the underside, inserted from bottom to top.
- In the wheel arches, unscrew the bolts securing the fender liners to the bumper.
- Behind the fender liners, unscrew the bolts attaching the bumper corners to the fenders.
- In the trunk, remove the rear and side trim panels.
- Behind the side trim panels, unscrew the bolts and nuts securing the bumper sides to the body.
- Finally, unscrew the nuts securing the bumper reinforcement to the body.
- With an assistant, carefully pull the bumper backward.
Model Overview
The Mazda Xedos 9 stood out with its elegant design, featuring smooth lines and minimal chrome accents. The interior used high-quality materials such as leather, wood, and aluminum trim. The car came with front-wheel drive and a 4- or 5-speed automatic transmission.
Technical Features:
- Suspension – independent multi-link, balancing comfort and handling;
- Safety – ABS, airbags, stability control (on later versions);
- Miller Cycle Engine – utilized a complex supercharging mechanism to reduce fuel consumption without sacrificing power.
Interesting Facts
- The Miller Cycle engine was one of the few production models to use this technology, achieving efficiency close to diesel engines but requiring precise tuning.
- An attempt at the premium segment – the Mazda Xedos 9 was designed to rival the BMW 5 Series and Mercedes E-Class, but due to limited brand recognition in this class, sales were modest.
- Rarity in Europe – due to its high price and competition from German brands, the Xedos 9 was not widely popular, making it a rare sight today.
- Connection to the Mazda 626 – despite its premium positioning, the Xedos 9 shared some components with Mazda’s more mainstream models.
Conclusion
The Mazda Xedos 9 is an intriguing yet underrated car that combined advanced technology and comfort. Despite its limited commercial success, it remains a testament to Mazda’s engineering ambitions in the 1990s. Today, it attracts the attention of collectors and enthusiasts of Japanese automobiles.