
 English
  Italiano
  Français
  русский
  Deutsch
  Español
 Model Name and Production Years
The Mazda Xedos 6 is a mid-size sedan produced by the Japanese automaker Mazda from 1992 to 1999. The model was primarily sold in European and Japanese markets, where it was also known as the Eunos 500 (under the Eunos sub-brand). It was not offered in North America.
Model Code and Platform
The Xedos 6 was based on the Mazda CA platform, which was also used for the third-generation Mazda Capella (626). The model code for the European version was CA5S, while the Japanese Eunos 500 was designated as CA3S.
Body Type and Modifications
The car was produced exclusively as a 4-door sedan. The engine lineup included the following options:
- 1.6L (B6-DE) – 114 hp, available in early European versions.
- 2.0L V6 (KF-DE) – 140 hp, the most common modification.
- 2.0L V6 (KF-ZEM) – equipped with a supercharger, 170 hp (only for the Japanese market under the Eunos 500 name).
Transmission options: 5-speed manual (5MT) or 4-speed automatic (4AT).
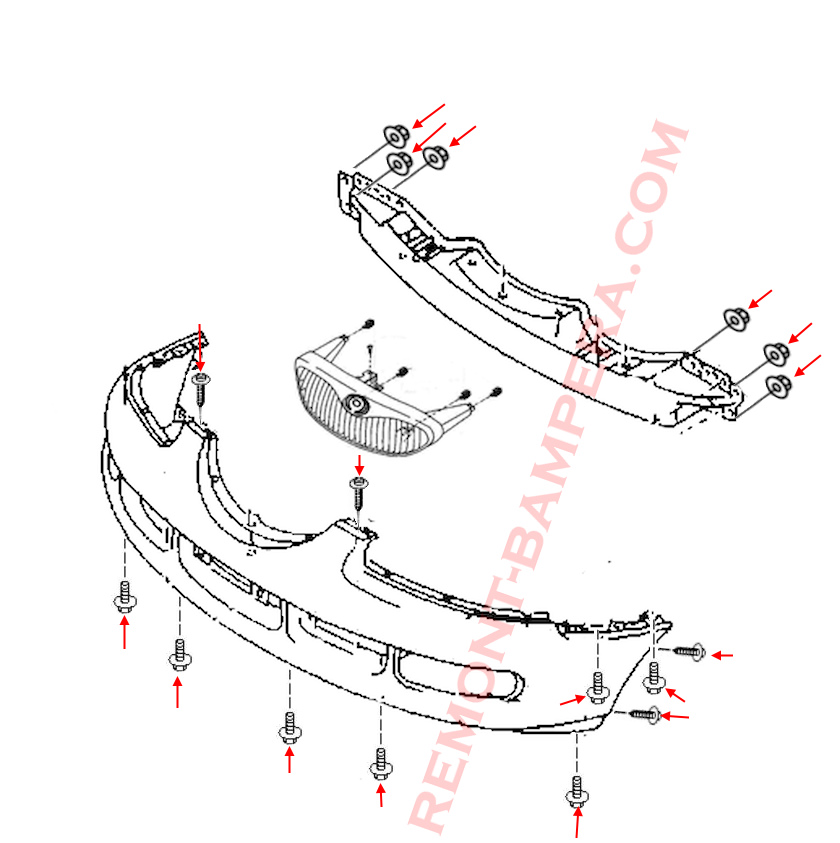
How to Remove the Front Bumper
- Unscrew the bolts and release the front part of the wheel liners.
- Push the wheel liners aside and unscrew the bolts securing the sides of the bumper to the fenders.
- Unscrew the bolts from the underside, which are fastened from bottom to top.
- Lift the hood up.
- Release the clips and remove the radiator grille.
- Unscrew the bolts and remove the turn signals and headlights.
- Through the headlight openings, unscrew the nuts securing the bumper reinforcement to the body.
- With an assistant, remove the bumper by pulling it forward.
- Disconnect the fog light connectors (if installed).
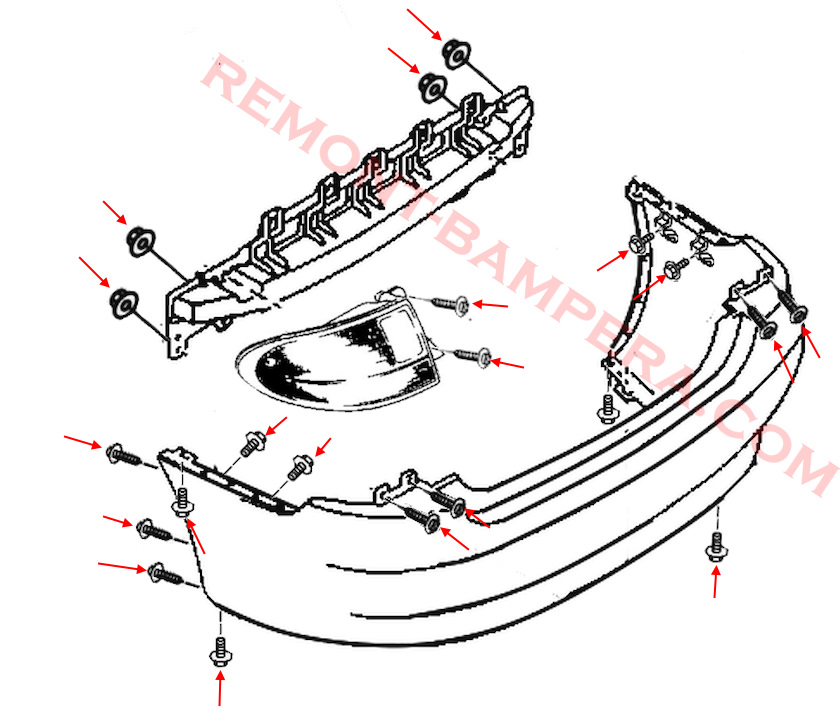
How to Remove the Rear Bumper
- Open the trunk lid.
- Unscrew two bolts on each side, release from the retainers, disconnect the power connectors, and remove the rear taillights.
- Behind the taillights, unscrew two bolts on each side securing the top edge of the rear bumper.
- Unscrew three bolts from the underside, fastened from bottom to top.
- In the wheel arches, unscrew the bolts and release the rear part of the wheel liners.
- Behind the wheel liners, unscrew one bolt on each side securing the bumper corners to the fenders.
- Remove the rear trunk panel trim and release the side trims.
- From the inside of the fenders, unscrew two bolts on each side.
- Unscrew two bolts securing the bumper reinforcement to the rear trunk panel.
- Unscrew two more bolts from the underside.
- With an assistant, remove the bumper by pulling it backward.
Model Description
The Mazda Xedos 6 was positioned as a premium sedan in the brand's lineup. Its design featured smooth lines, pop-up headlights (on early versions), and an elegant silhouette. The interior was crafted with high-quality materials, including leather and wood trim (in top-tier configurations).
Key Features:
- Multilink rear suspension, ensuring good handling.
- Optional all-wheel drive (only for the Japanese market).
- The supercharged KF-ZEM version utilized the Miller Cycle system, improving engine efficiency.
Interesting Facts
- Eunos Sub-Brand – The Xedos 6 was initially developed for the premium Eunos brand, but after its discontinuation in 1996, the model continued to be sold under the main Mazda brand.
- Rarity in Europe – Due to its high price and competition with German brands, sales of the Xedos 6 in Europe were low, making it a rare sight today.
- Pop-Up Headlights – Early versions (1992–1994) featured retractable headlights, but due to high costs and reliability issues, they were later abandoned.
- Influence on the Mazda 6 – Some engineering solutions tested in the Xedos 6 were later implemented in the first-generation Mazda 6.
Conclusion
The Mazda Xedos 6 represents the Japanese brand's attempt to enter the premium segment. Despite its advanced technology and high-quality build, the model never achieved mass popularity but remains an interesting collector's item. Today, the Xedos 6 is valued for its unique design, rare engines, and status as a "forgotten premium" car of the 1990s.