-
-
-
SEAT Cordoba II 6L (2003-2009)
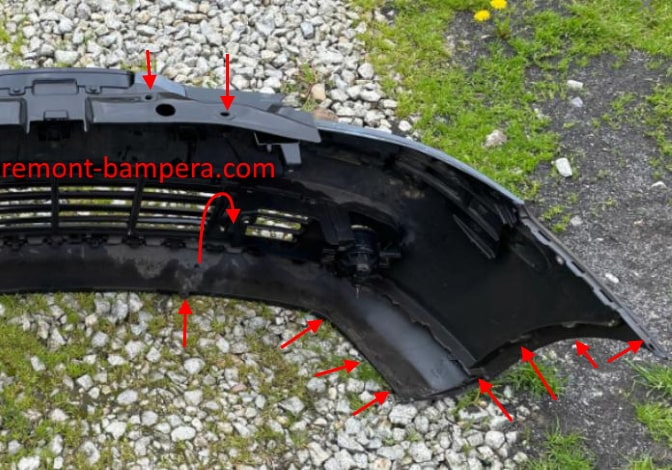
Front bumper
Depending on the model year and version of the model the attachment is different.
-unscrew the four screws under the hood (if there is take out the rivets).
-unscrew the two screws on the edges of the center lower grille.
-unscrew the screws around the perimeter at the bottom of the bumper (spun up).
-wrenched the wheel to the left or right side depending on which side we will analyze first.
-wheel arches unscrew the screws that attach the fender liner.
-with the assistant pulls the edges of the bumper to the sides, tearing off the latches, and pulled off of the guide itself.
-remove connector from the PDC (if any).
-if you have headlight washers, disconnected the hoses. The liquid does not leak you need to prepare the tube or container.
-remove the connector from the fog lamp.

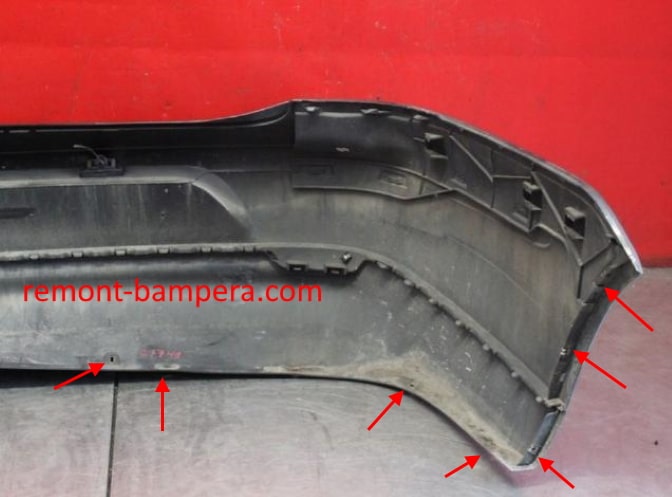
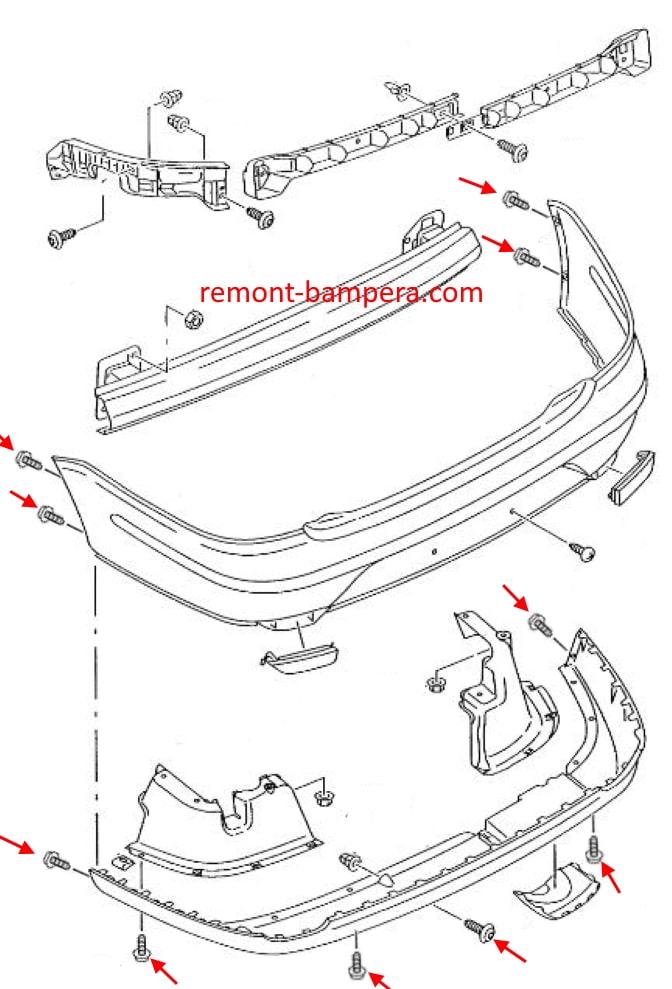
Rear bumper
Depending on the model year and version of the model the attachment is different.
-unscrew the screws in the wheel arches that secure the wheel arches (not to remove the wheel, remove ratchet with a nozzle).
-move the wing flaps to the side and unscrew one screw on each side .
-unscrew the two screws that attach the bottom skirt (can be caps).
-unscrew the screws around the perimeter in the bottom (spun up).
-with the assistant pulls the bumper guides on yourself.
-remove the electrical connector license plate light.
-remove connector from the PDC (if any).

 English
  Italiano
  Français
  русский
  Deutsch
  Español