-
-
-
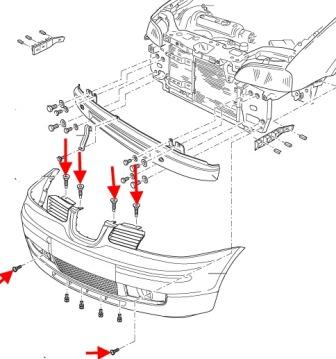
Front bumper
Depending on the model year and version of the attachment may vary slightly.
-open the hood and Unscrew the four screws (spun down).
-Unscrew the screws and remove the bottom side garnish grille.
-Unscrew one screw on each side for decorative grilles.
-with the assistant pulls the bumper from the guides themselves.
-remove connector from the PDC (if any).
-remove the connector from the fog lamp.

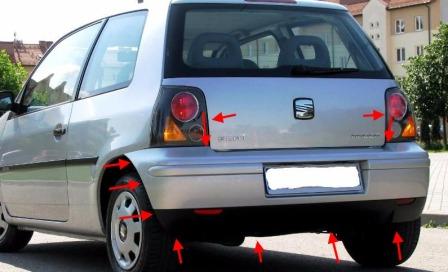
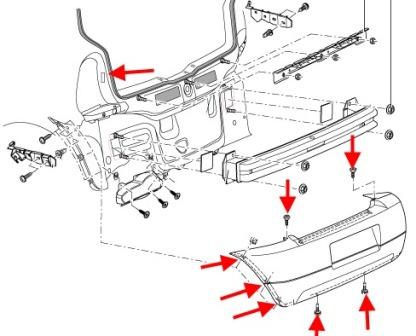
Rear bumper
Depending on the model year and version of the attachment may vary slightly.
-open the boot lid and Unscrew one screw on each side that secure the tail lights.
-remove tail lights.
-under the rear lights Unscrew one screw on each side.
-Unscrew the screws in the wheel arches that secure the wheel arches (not to remove the wheel, remove ratchet with a nozzle).
-move the wing flaps to the side and Unscrew one screw on each side (twisted up) (may not be).
-Unscrew the screws around the perimeter in the bottom (spun up).
-with the assistant pulls the bumper from the guides themselves.
-remove the electrical connector license plate light.
-remove connector from the PDC (if any).

 English
  Italiano
  Français
  русский
  Deutsch
  Español