
 English
  Italiano
  Français
  русский
  Deutsch
  Español
 The Opel Agila A is a compact city car that debuted in 2000 and quickly gained popularity due to its practicality and affordability. But did you know that this model also goes by other names? Depending on the market and Opel's partnership agreements, the Agila A is also known as the Vauxhall Agila, Suzuki Wagon R+, or Suzuki Splash (in some countries). This is because Opel and Suzuki were actively collaborating at the time, sharing platforms and technologies.
Model Description
The Opel Agila A is a typical representative of the urban microcar category. Its compact dimensions (length of about 3.5 meters) made it ideal for maneuvering through narrow streets and finding parking in crowded cities. Despite its modest size, the Agila A's interior surprised with its spaciousness, thanks to the high roof and a well-thought-out layout.
The car was offered with two petrol engines: a 1.0-liter (60 hp) and a 1.2-liter (75 hp), which were quite sufficient for its weight and purpose. The transmission was either a 5-speed manual or a 4-speed automatic. The Agila A was front-wheel drive, and its suspension was tuned for comfortable driving on city roads.
The design of the model was simple but cute: rounded shapes, large headlights, and a high driving position that provided good visibility. Inside, minimalism prevailed but with practical elements: folding seats, a spacious trunk for its class, and numerous storage compartments for small items.
Bumper Plastic: Marking >PP+EPM<
Tools for Removal:
- Socket wrenches with an extension.
- Pry tool for clips.
- Phillips screwdriver.
- Depending on the year of manufacture and trim, the mounting points may vary slightly.
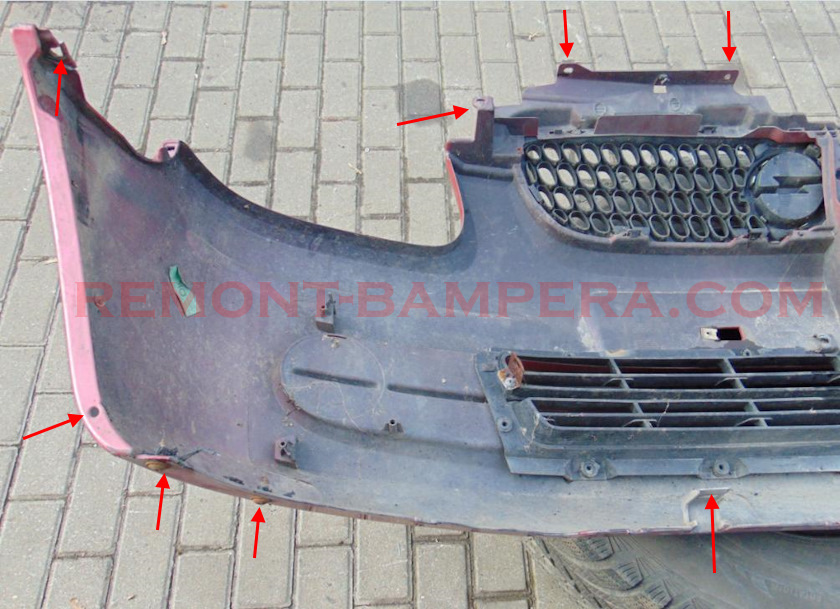
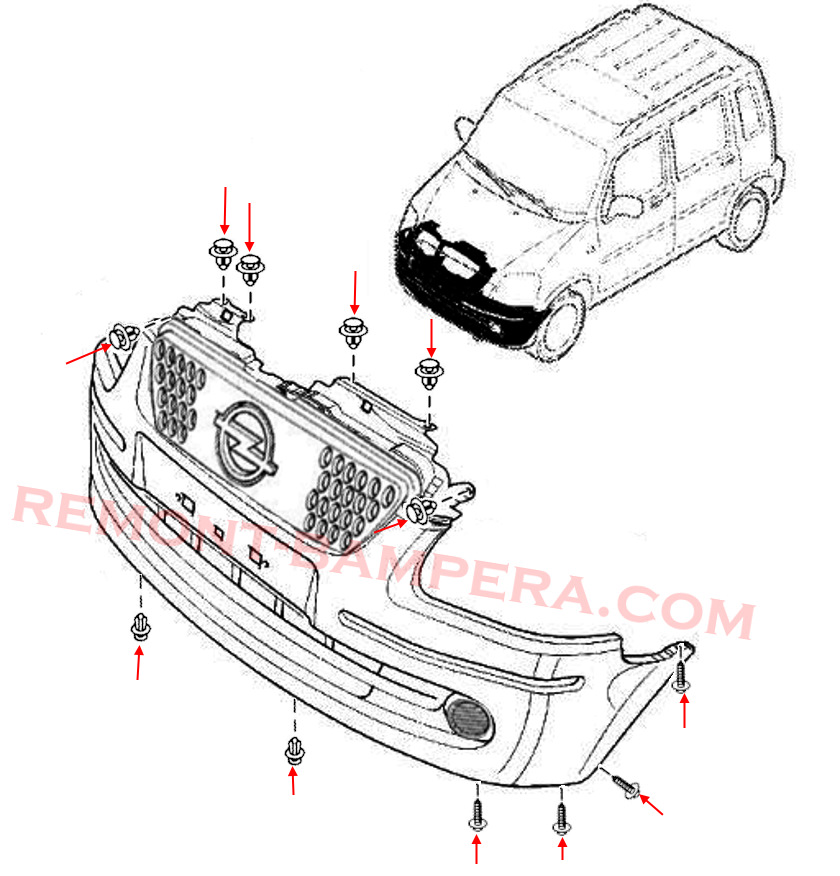
How to Remove the Front Bumper
- Lift and secure the hood.
- Under the hood, remove four clips inserted from top to bottom and two clips near the headlights.
- From the underside, unscrew four screws and remove two clips.
- For convenience, turn the wheels to the side.
- In the wheel arches, unscrew one screw securing the fender liners and one screw (fastened from bottom to top) securing the corners to the fenders.
- Release the fasteners in the fenders.
- With the help of an assistant, remove the bumper forward, being careful not to damage the wires.
- Disconnect the electrical connectors from the temperature sensor.
- The bumper is removed; installation is done in reverse order.
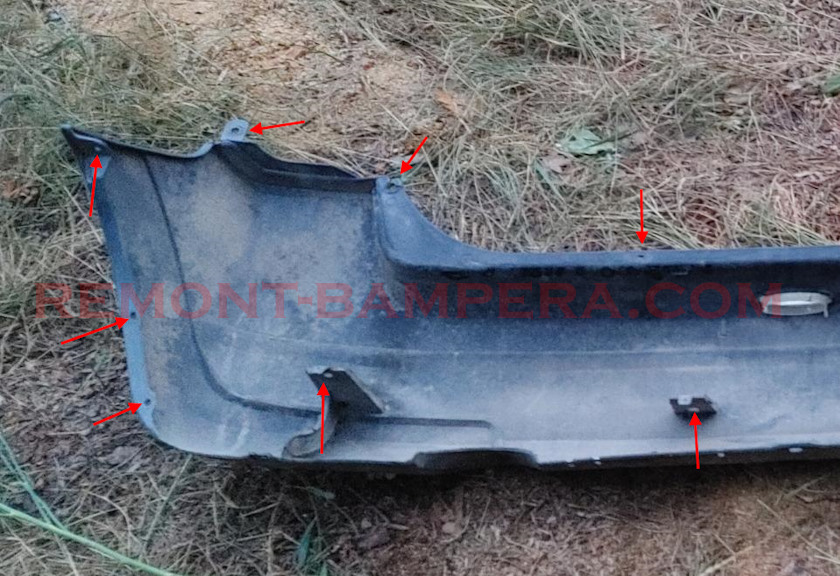
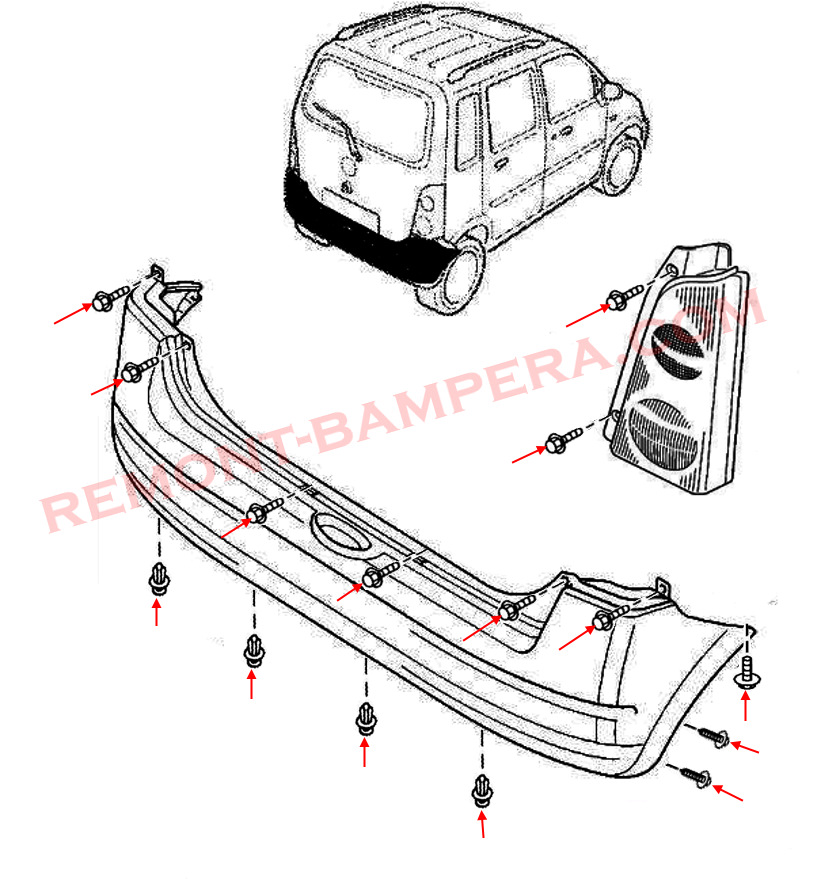
How to Remove the Rear Bumper
- Open the trunk lid.
- In the trunk opening, unscrew four screws securing the top side of the rear bumper.
- Unscrew two screws on each side and remove the rear lights.
- Under the rear lights, unscrew two more screws.
- From the underside, remove four clips inserted from bottom to top.
- In the wheel arches, unscrew two screws on each side securing the fender liners and one screw (fastened from bottom to top) securing the corners to the fenders.
- With the help of an assistant, remove the bumper backward, paying attention to the wires.
- Disconnect the electrical connectors, if any.
- The bumper is removed; installation is done in reverse order.
Interesting Facts
- Family Ties: The Opel Agila A was developed on the Suzuki Wagon R platform, which explains their external resemblance. However, Opel made changes to the design and suspension to adapt the car to the European market.
- Fuel Efficiency: Thanks to its lightweight body and small engines, the Agila A was one of the most fuel-efficient cars of its time. Fuel consumption in the city rarely exceeded 6-7 liters per 100 km.
- Popularity Among Women: Due to its compact size and ease of handling, the Agila A was often chosen by women. It became a true "ladies' car" in Europe.
- Unexpected Capacity: Despite its small exterior size, the Agila A could accommodate up to four adult passengers, and with the rear seats folded down, it turned into a small cargo carrier capable of transporting bulky items.
- Cult Status: In some countries, such as Germany, the Agila A became a cult car for students and young families due to its affordability and reliability.
Conclusion
The Opel Agila A is an example of how a small car can become a big helper in urban hustle and bustle. It did not aspire to be a "dream car," but it won the affection of thousands of owners thanks to its simplicity, practicality, and reliability. If you're looking for a reliable "city workhorse," the Agila A is an excellent choice that continues to satisfy its owners even after many years.