-
-
-
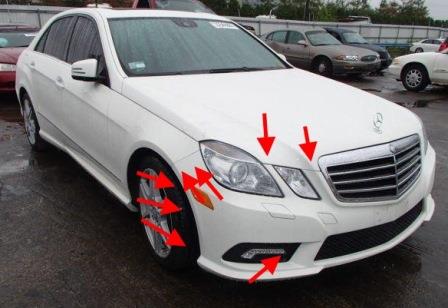
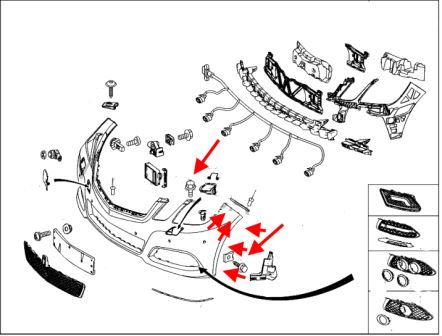
Front bumper
-Unscrew the wheel left or right depending on which side will Unscrew first.
-wheel arches get the rivets that attach the fender liner to the bumper.
-move the wing flaps to the side and Unscrew two screws on each side (spun upwards) holding the bumper to the wings.
-under the hood remove the air intakes (hold on clips).
-under the air intakes and pull out staples and remove the grille.
-Unscrew the bolts near the headlights.
-from under the car, near the fog lights, Unscrew one bolt on each side.
-pulls the bumper itself.
-remove the connectors from the fog lights.
-if there is paramilitary disconnect the hoses from the injectors and close them with stoppers that from the reservoir was leaking fluid
-if you have sensors, remove the common connector.
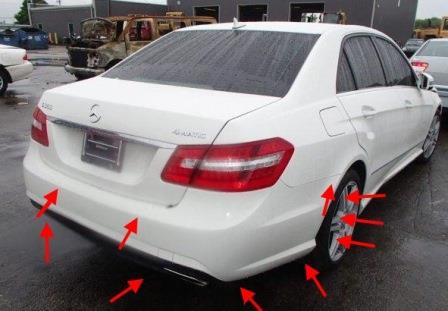
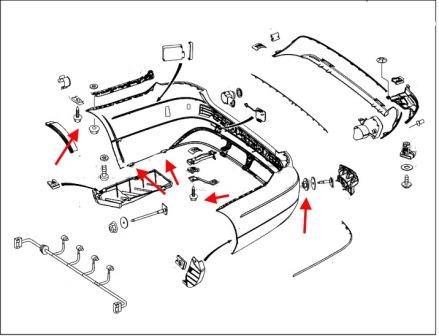
Rear bumper
-wheel arches take out the rivets that attach the fender liner to the bumper.
-move the wing flaps to the side and Unscrew the screws holding the corners of the bumper to the wings (spun upwards).
-from under the car, around the bottom part of the bumper Unscrew the six bolts.
-in the trunk remove the rear panel (holding latches).
-under panel, Unscrew the two nuts.
-at the corners of the bumper pull to the side and pulls back (better to do it together not to scratch the paint).
-remove connector from the PDC (if any).
-the bumper is cleared.

 English
  Italiano
  Français
  русский
  Deutsch
  Español