Depending on the year and configuration of the attachment locations can vary.

Front bumper

-open the hood.

-under the hood, Unscrew the five screws (spun down) that secure the upper part. If there is, release the lining.

-Unscrew the eight screws around the perimeter of the bottom (spun up).

-wrenched the wheel to the side.

-wheel arches take out the caps and removed the wheel arches (the front part).

-for wheel arch liners Unscrew two screws on each side (spun upwards) holding the corners of the bumper to the wings.

-with the assistant pulls the bumper forward, releasing the latches (look for wires).

-release the connectors for the fog lamps and Parking sensors the temperature sensor (if any).

the attachment of the front bumper of the Mercedes CLA-Class C117

The scheme of fastening of the front bumper of the Mercedes CLA-Class C117


Rear bumper

⇒Tips for removing bumpers and how to avoid breaking anything..⇐

-open the trunk lid.

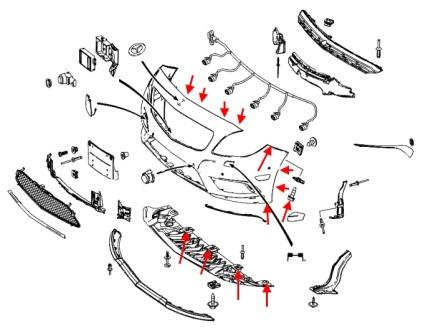
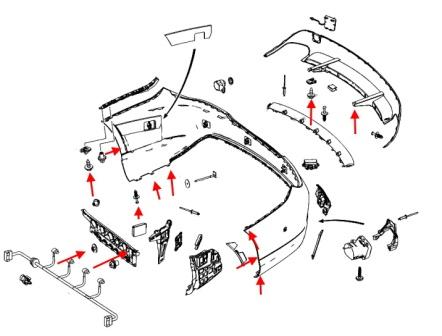
-in the trunk remove the plastic cover of the rear panel.

-for covering the back panel, through the holes, Unscrew the two nuts.

-Unscrew the screws and take out the caps on the perimeter of the bottom.

-wheel arches take out the caps and removed the wheel arches (rear).

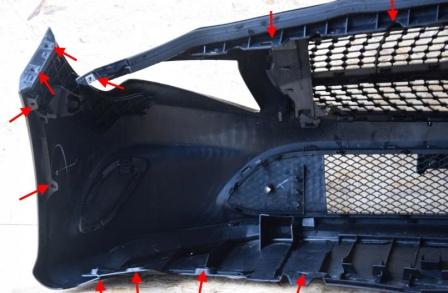
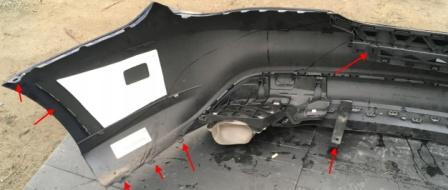
-the fender liner, Unscrew the screws holding the corners of the bumper to the wings.

-we release the latch in the wings (pull the corners themselves).

-release the clips under the rear lights (sitting very tightly, if you don't, you need to remove the tail lights and pry with a flat head screwdriver).

-with the assistant pulls the bumper backwards (look for wires).

-snap together the connectors of the equipment (if any).

the attachment of the rear bumper Mercedes CLA-Class C117

Diagram of rear bumper Mercedes CLA-Class C117